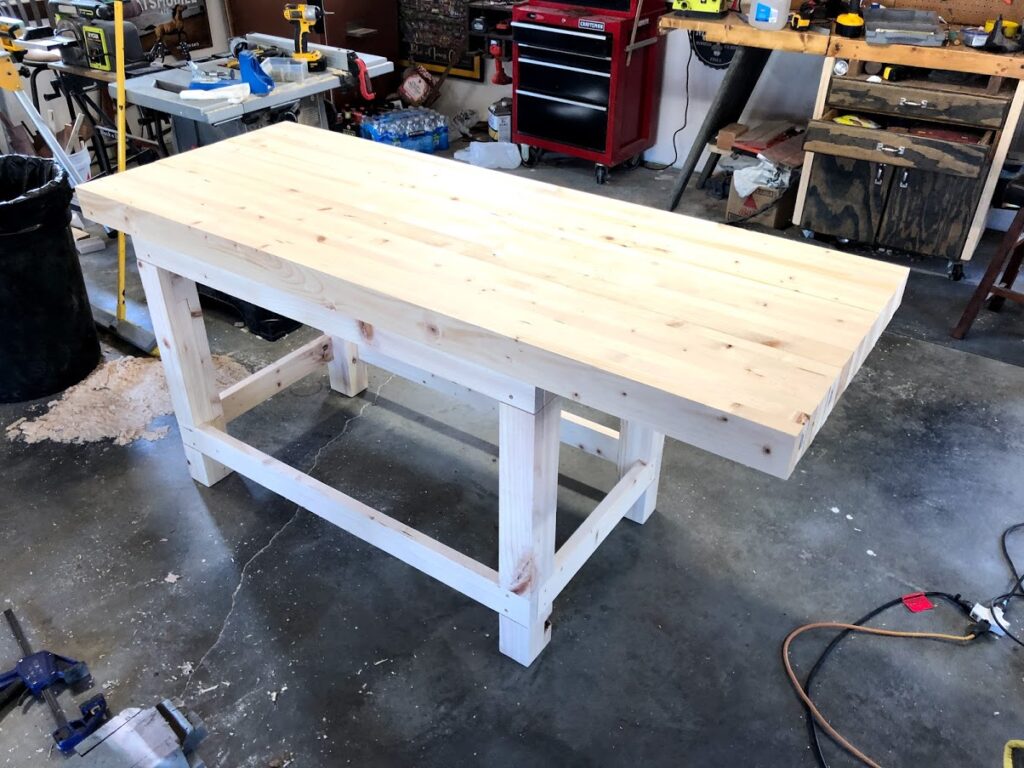
This is how I built a massive workbench for my garage shop for under $100 using only 2×4’s and wood glue (and a few screws).
I went to one of the local big box stores and bought a bunch of 8’ 2×4’s. The best way to do this would be to get 12 footers and cut them in half, since most of my cuts ended up being 6’ long to form the benchtop. But I didn’t want deal with hauling longer boards in my short bed truck, so I knew I could make this work and have limited waste.
Final dimensions of workbench:
Top: 27 ½” x 71 ½” x 3 3/8”
Legs: 31 ½” x 3 ¼” x 4”
Skirt runners: 4 boards at 4’, and 4 boards at 23 ¾”

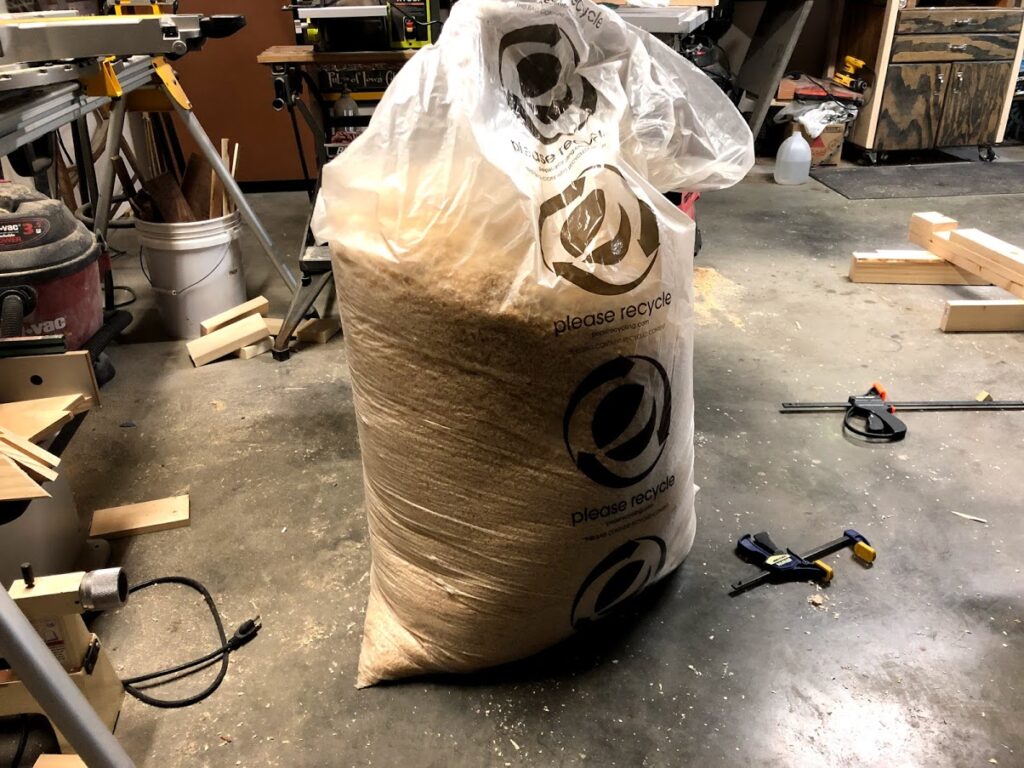
I started by planning all 26 boards. When you buy 2×4’s from the big box stores they’re usually pretty rough and have stamps or other markings all over them. I ran each board through several times on each side until I got each board down to about 1 5/16 from the 1 ½” they started at. I didn’t need all these to be the exact same width, and when you run 26 boards through 10-15 times, you tend to lose track of what’s what. Also, it tends to make a lot of sawdust, as evidenced by the image to the right.
Once all my boards were milled, I got to cutting. Here’s the basic cut list:
21 boards at 6’
4 boards at 4’
4 boards at 23 ¾”
8 boards at 31 ½” (ran out of boards, so since this was for the legs I took some of my leftover boards from the off-cuts on the 6’ sections and used those to sandwich things together to make up a leg post that was 31 ½” long).

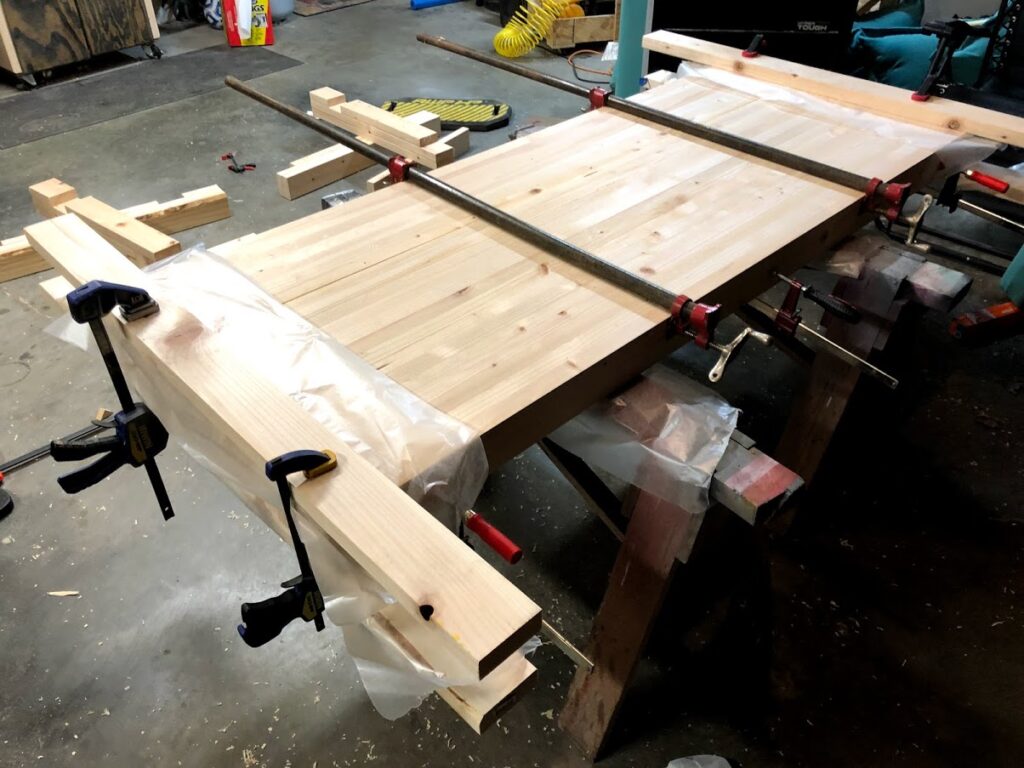
To glue up the benchtop, I made three sections. I glued up 7 of my 6’ long boards together to form a section, making it about 9 1/8” wide. I did it this way so I could run each section through the planer to get the top and bottom nice and smooth. I used a digital caliper to make sure each section was exactly the same thickness. Once the planing was done, I glued the three sections together. When I did the gluing, I also used some 2×4’s on the ends, putting a board on the top and bottom of the end (with wax paper in between), so that I kept the three sections as even as possible. Sometimes when you get to tightening your clamps the wood tends to slide and shift, and these boards clamped on the ends really helped keep things even.

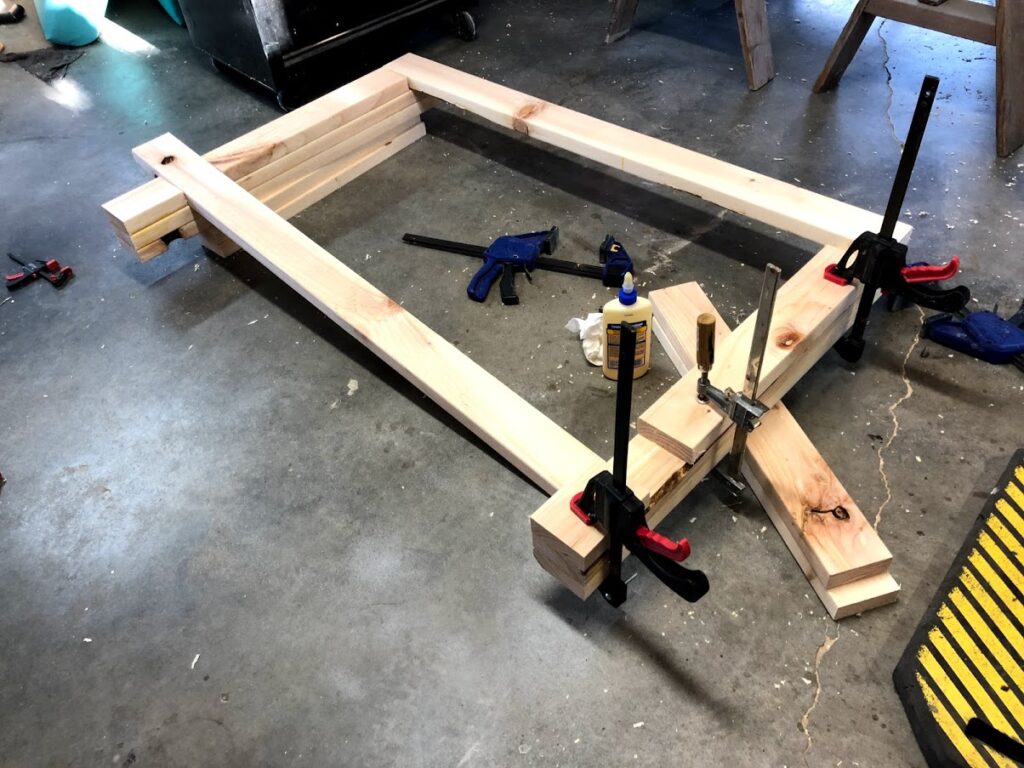
With the benchtop assembled, I moved on to the legs. As I indicated before, this project is all 2×4’s, so no posts for the legs. So I glued up several boards to make my legs. I started by gluing up 2 boards together that were 31 ½” long. I didn’t do 3 boards right away because I knew I could use smaller off-cuts to glue on and space them out for mortises that would later have the skirt-runners to fit into. Gluing those in the correct place was a challenge, which you can see in the video. But I basically used 2×4’s as spacers to clamp things down, and then removed those spacers so they didn’t get glued to the wood just yet.
Why not yet? Because I still needed to cut the mortises on each leg for the skirt runners that would go the width of the table base (just under two feet). I cut the mortises on the table saw by using the miter gauge to push cut after cut, moving about an eighth of an inch each pass. That left me with a stripped-out slot, which I cleaned up with a chisel to form the mortise. Each leg got an extra mortise at the top and 6” from the ground.
With the legs cut and fully sanded, it was time for assembly. First, I screwed the long skirt runners into the legs, giving me two side leg panels. Then I flipped by top upside down and began assembling the leg base into its rectangular shape. With to panels already assembled, I just connected them by screwing in the four shorter skirt runners. Once that was done, I lined up the base where I wanted it and screwed it in with pocket holes and screws. I have no idea if this was a good or bad idea, but I did it with the thought that I someday may need to take this thing apart (there is zero chance that happens). But from the pics and the video you can see the top is offset to the base, and I did this because I will someday add a benchtop vise to this and wanted plenty of space to do so. But there is still about a 5 ½” overhand on the short side, which is plenty to get clamps on to workpieces.
 With everything assembled, I flipped it right-side-up and then leveled both ends of the top. I drew a straight line, and then made a cut all the way down with my circular saw. Since the blade wasn’t deep enough to go through the thickness of the top, I finished the cutting with a pole saw. Then it was just a matter of doing the final touches of adding a chamfer on all the edges with my palm router and sanding. I used a belt sander to even the seems up on the two seems for the three sections that formed the top. Then I hit it with the orbital, stepping up through the grits to 220.
And that’s it for this section of the build. I’ll be posting a future video and blog about the workbench modifications I’ve made since this was published, and hopefully that will include some more things I have up my sleeve. An obvious thing I’ve left off here is finish, but if you must know I’ve since used colored forest green stain on the leg base and antique white stain on the top. And then I finished it with several coats semi-gloss polyurethane. Ultimately, I don’t much care about the finish. It’s a workbench and it’s going to see a lot of work, meaning it’ll get roughed up and destroyed as the months as years go on. Build it to use it!

If you have any feedback for how I could have done this differently or better, please let me know. And be sure to check out the YouTube video embedded above and subscribe to the channel if you haven’t already. Thanks for reading and watching!
Cheers,
Grant