The problem I was trying to solve here is that Nintendo Switch controllers and games are tiny and end up all over the place. Without some kind of shelf or place to put stuff we were already losing things. So, I drew up a few designs and came up with what you’ll see on this blog.
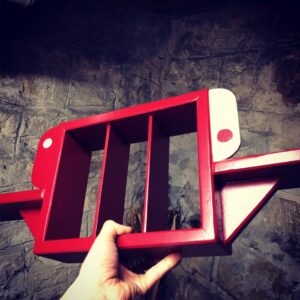
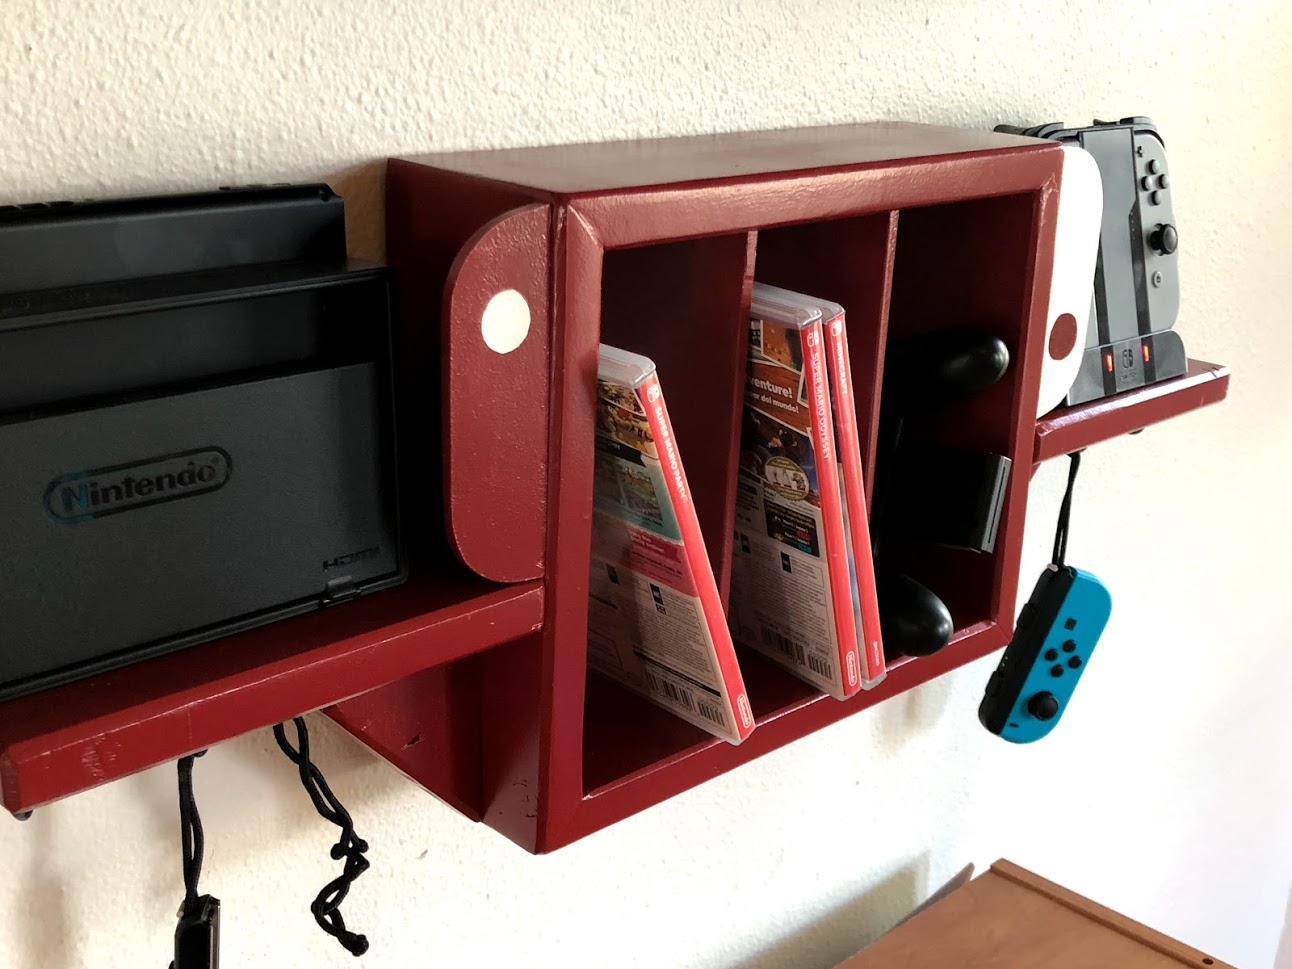
The goal of the design was to keep it minimalistic. The Switch and its components are small, so the shelf needed to be small. And my wife had the original idea of just putting some hooks up on the wall to hand the controllers on, so I knew that would be an easy space-saver to just add hooks somewhere along the bottom. I settled on a design that gave me shelf space for the game cases in the middle, and two shelf wings on the sides that would hold the Switch itself on ones side, and the controller charger on the other. I then added two small hooks to the bottom of each wing to hold the controllers that works perfect with that handy wrist strap they come with.
In total, this thing is about 25” long, 11” tall, and 3 ½” wide. The shelf part seems small at first, but we only have 3 games right now, and we’ve easily got room for 18.
The cool thing was that this project basically cost me zero dollars since I had all the materials laying around the shop. I used some 1×4’s to form the shelf, and some ¼” hardboard for the dividers, both leftover from previous projects. Putty, wood glue, screws, and hooks I all had on hand. Even the red spray paint and the spray poly I had in my shop.
I made things a little more complicated by introducing the router and router table, but if you wanted to keep it simpler you could skip this step. I just added chamfered edges for looks (thought it made it look a bit more like Super Mario bricks), and I cut dados for the divider to sit in that didn’t come all the way to the front of the shelf. Again, you could easily just skip this by measuring a couple 1×4’s to size to fit in the middle and glue and screw them in.
And then for style I decided to try and incorporate the Switch logo to it. I used the scollsaw to cut out a couple tabs for each side that are shaped like the controllers and logo. Way easier than scrollsawing “NINTENDO” across the top!
This was a simple project that provides a lot of functionality and a pretty cool appearance. It’s small, it’s simple, and it has a Nintendo look to it. If you have ideas or thoughts on how I could improve it or how I could have done it differently, please let me know!
Thanks for reading and watching!
Cheers!
Grant