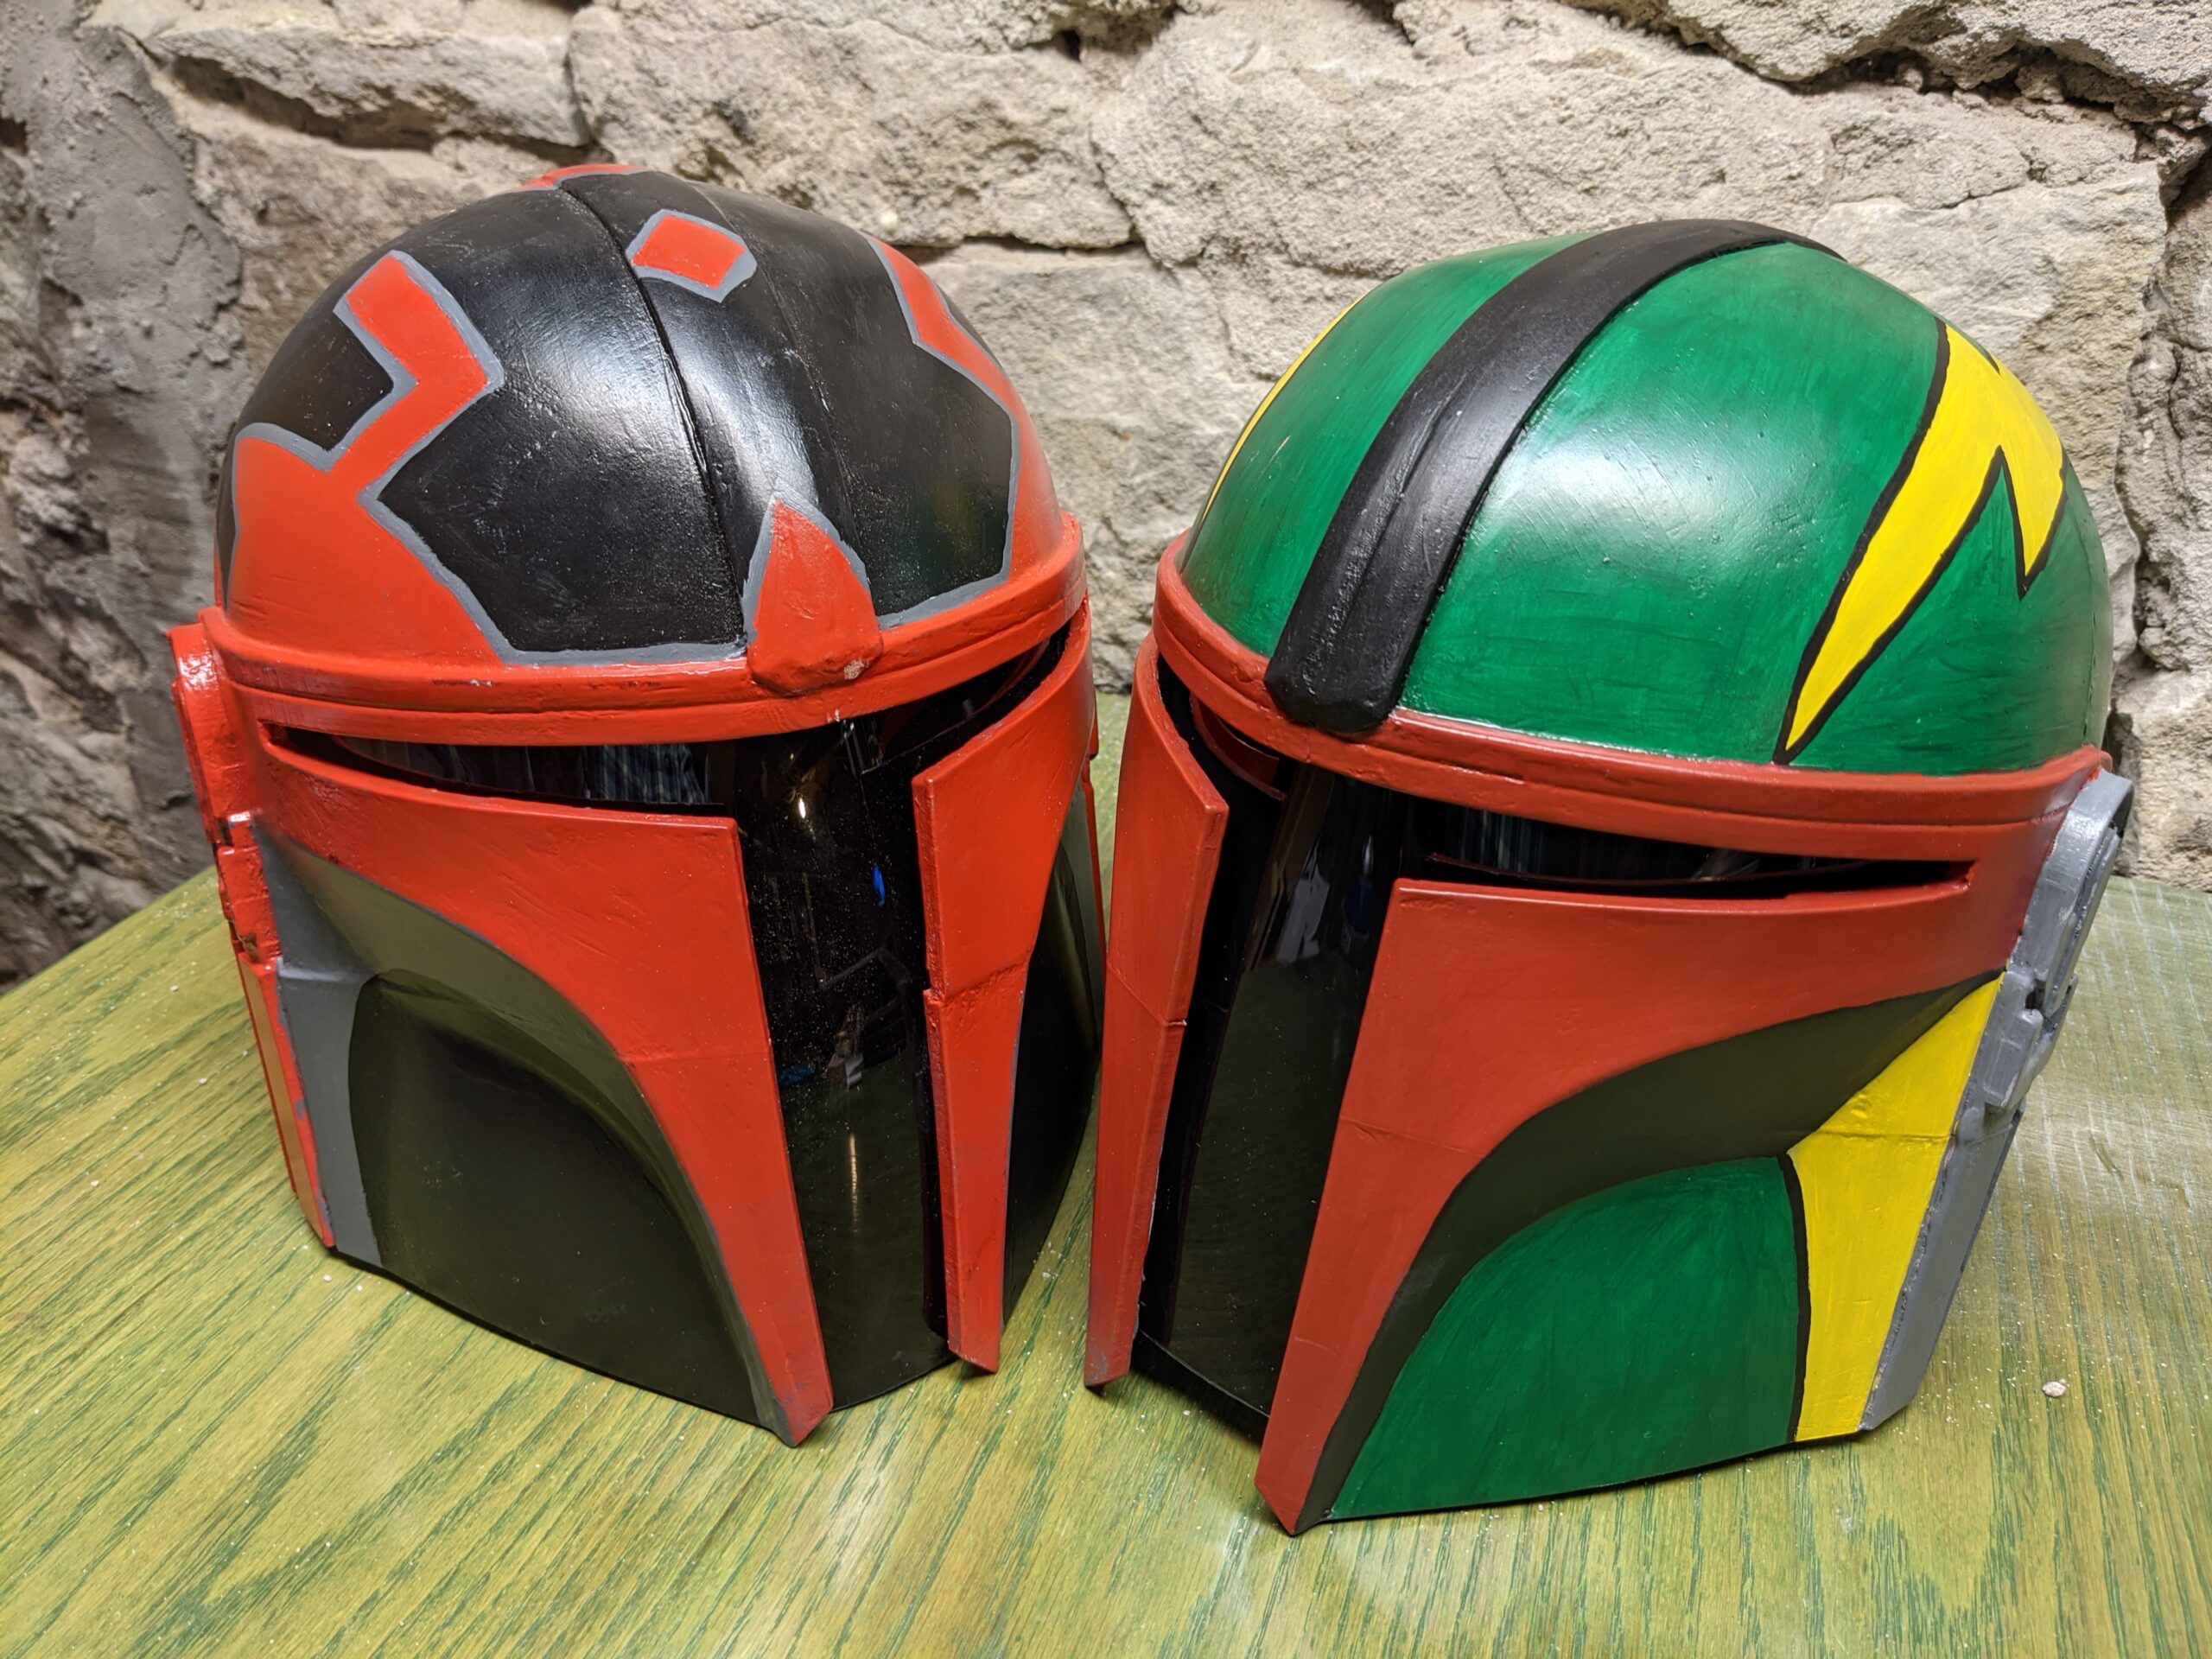
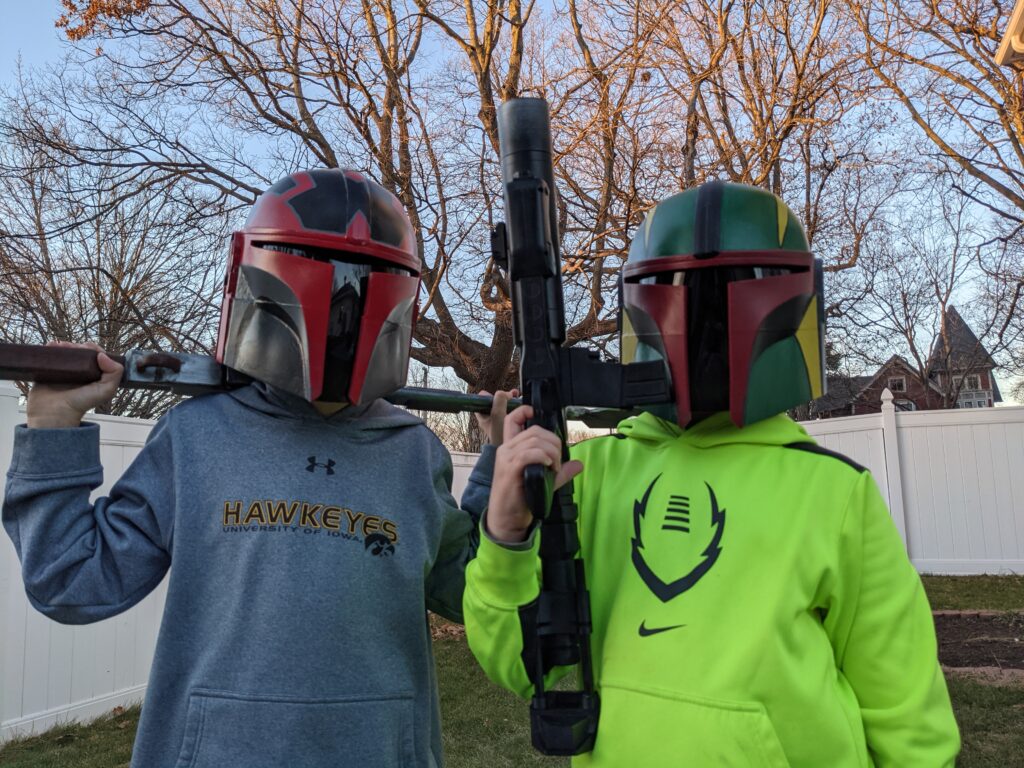
The boys wanted their own Mandalorian helmets from Star Wars, so we 3D printed the parts, epoxied them all together, glued in a visor, and did our own custom paint job.
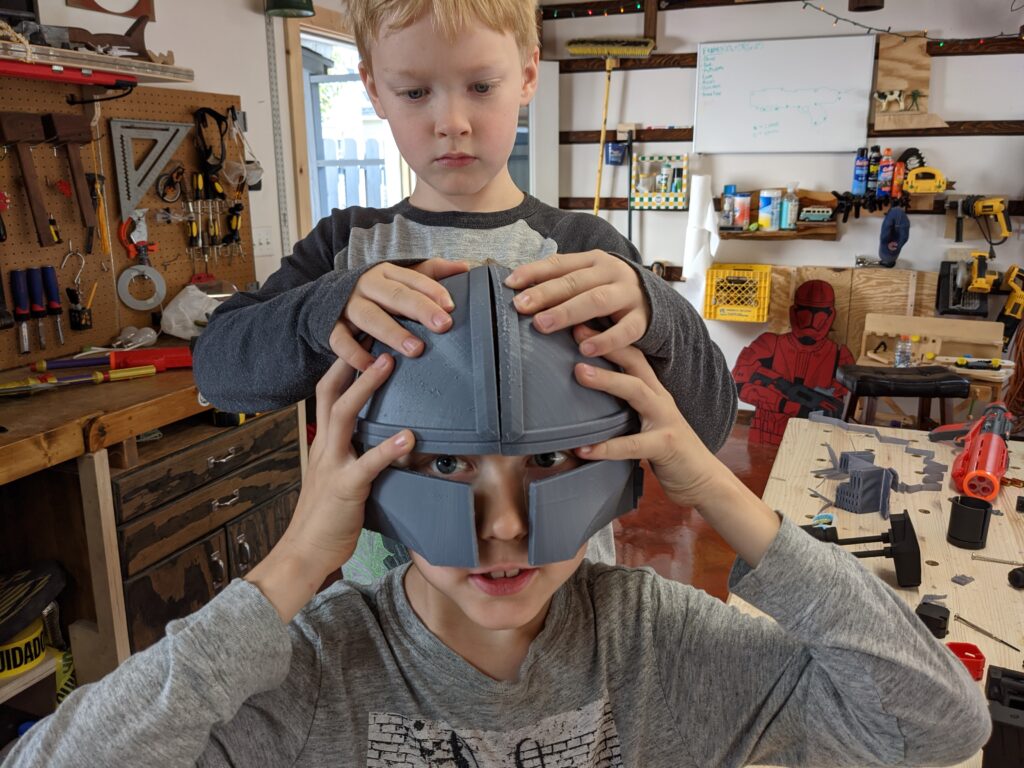
I found the files on Thingiverse. There are all kinds of various Mandalorian Helmets on the site, but I chose this link because it allowed be to print it in eight separate sections, which was necessary since my printer is so small.
I glued everything together with JB Weld epoxy. It doesn’t matter the color since it’s all getting painted anyway, but I did find that using the black epoxy against the white filament really shows you where you have and haven’t coated the piece. Once the epoxy was cured, I cleaned it up with my rotary tool and a file.
To solidify the helmets a bit, I coated the inside with a two-part fiberglass resin. This stuff is on Amazon (linked below), but you can probably find it cheaper at your local auto parts store. This stuff really smells, so wear a mask and apply it in a well ventilated place. It took me a bit longer than anticipated, so only mix what you can do in about ten minutes and then mix again. It will eventually start to solidify and if you’re as slow as me you’ll end up with a much of little goo balls that turn into really hard resin balls you’ll have to file off later.
Next step was adding Bondo glazing and spot putty. On the first helmet, I used a two-part putty, but I found that there is a one-part putty that works just as well and used that one on the second helmet. Once the putty is dry there was a bunch of sanding, followed by another coat of the putty and even more sanding.
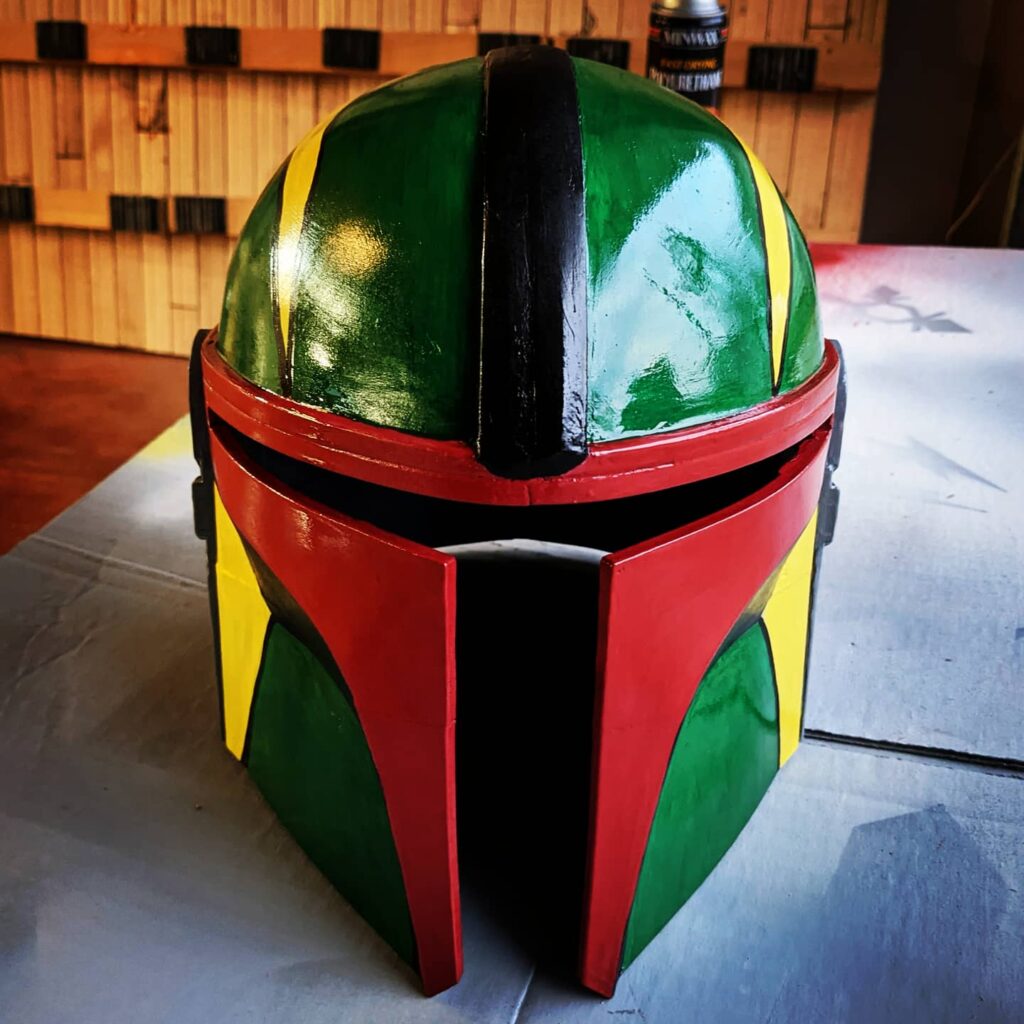
I used filler primer (linked below) to coat the helmets, and I believe I ended up doing three coats, including the insides of the helmet. Then I drew my design on with a pencil and got to painting. The boys wanted their own designs, but we looked at a variety of Mandalorian helmets from the Clone Wars series and then kind of tweaked them to make them their own. Brooks really wanted lightning bolts, so why not? I just use acrylic paint here, and it usually takes two coats (or possibly three for lighter colors) to get it to look even without brush strokes. Once the paint was dried I used spray semi-gloss polyurethane to coat them. You could brush this on, but I prefer to spend the extra money to get the spray cans for ease of use.
For the visors, the first one I bought off Amazon was very rigid, but I found a cheaper and flimsier one for the second helmet. This is a step where you actually prefer cheaper and flimsier, as you want the visor light and easy to work with to get it glued in. I’m assuming my children won’t be doing any welding with these on, but you never know, right? Anyhow, I used a Bondo putty that you kneed into little balls and apply.
And then to make them actually wearable, I bought a set of pads for a bike helmet off of Amazon, and the one kit was able to work for both helmets. The Velcro pieces have adhesive backing, but you may need to add your own glue as we had a few fall out relatively quickly.
And that’s pretty much it! A super easy and fun project. I say this all the time, but if you don’t own a 3D printer, you should totally buy a 3D printer! The boys love the helmets, and I am very happy with that. Now it might be time to make my own?? Anyhow, that’s for another day. In the meantime, thanks for reading and watching!
Cheers!
Grant
Items used:
3D print PLA filament (any color)
Various acrylic paints
Spray polyurethane (semi-gloss finish)
Helmet replacement foam padding kit
Tools used:
Ender 3 3D Printer, Dremel rotary tool, scissors, sanding paper, files, pencil, paint brushes