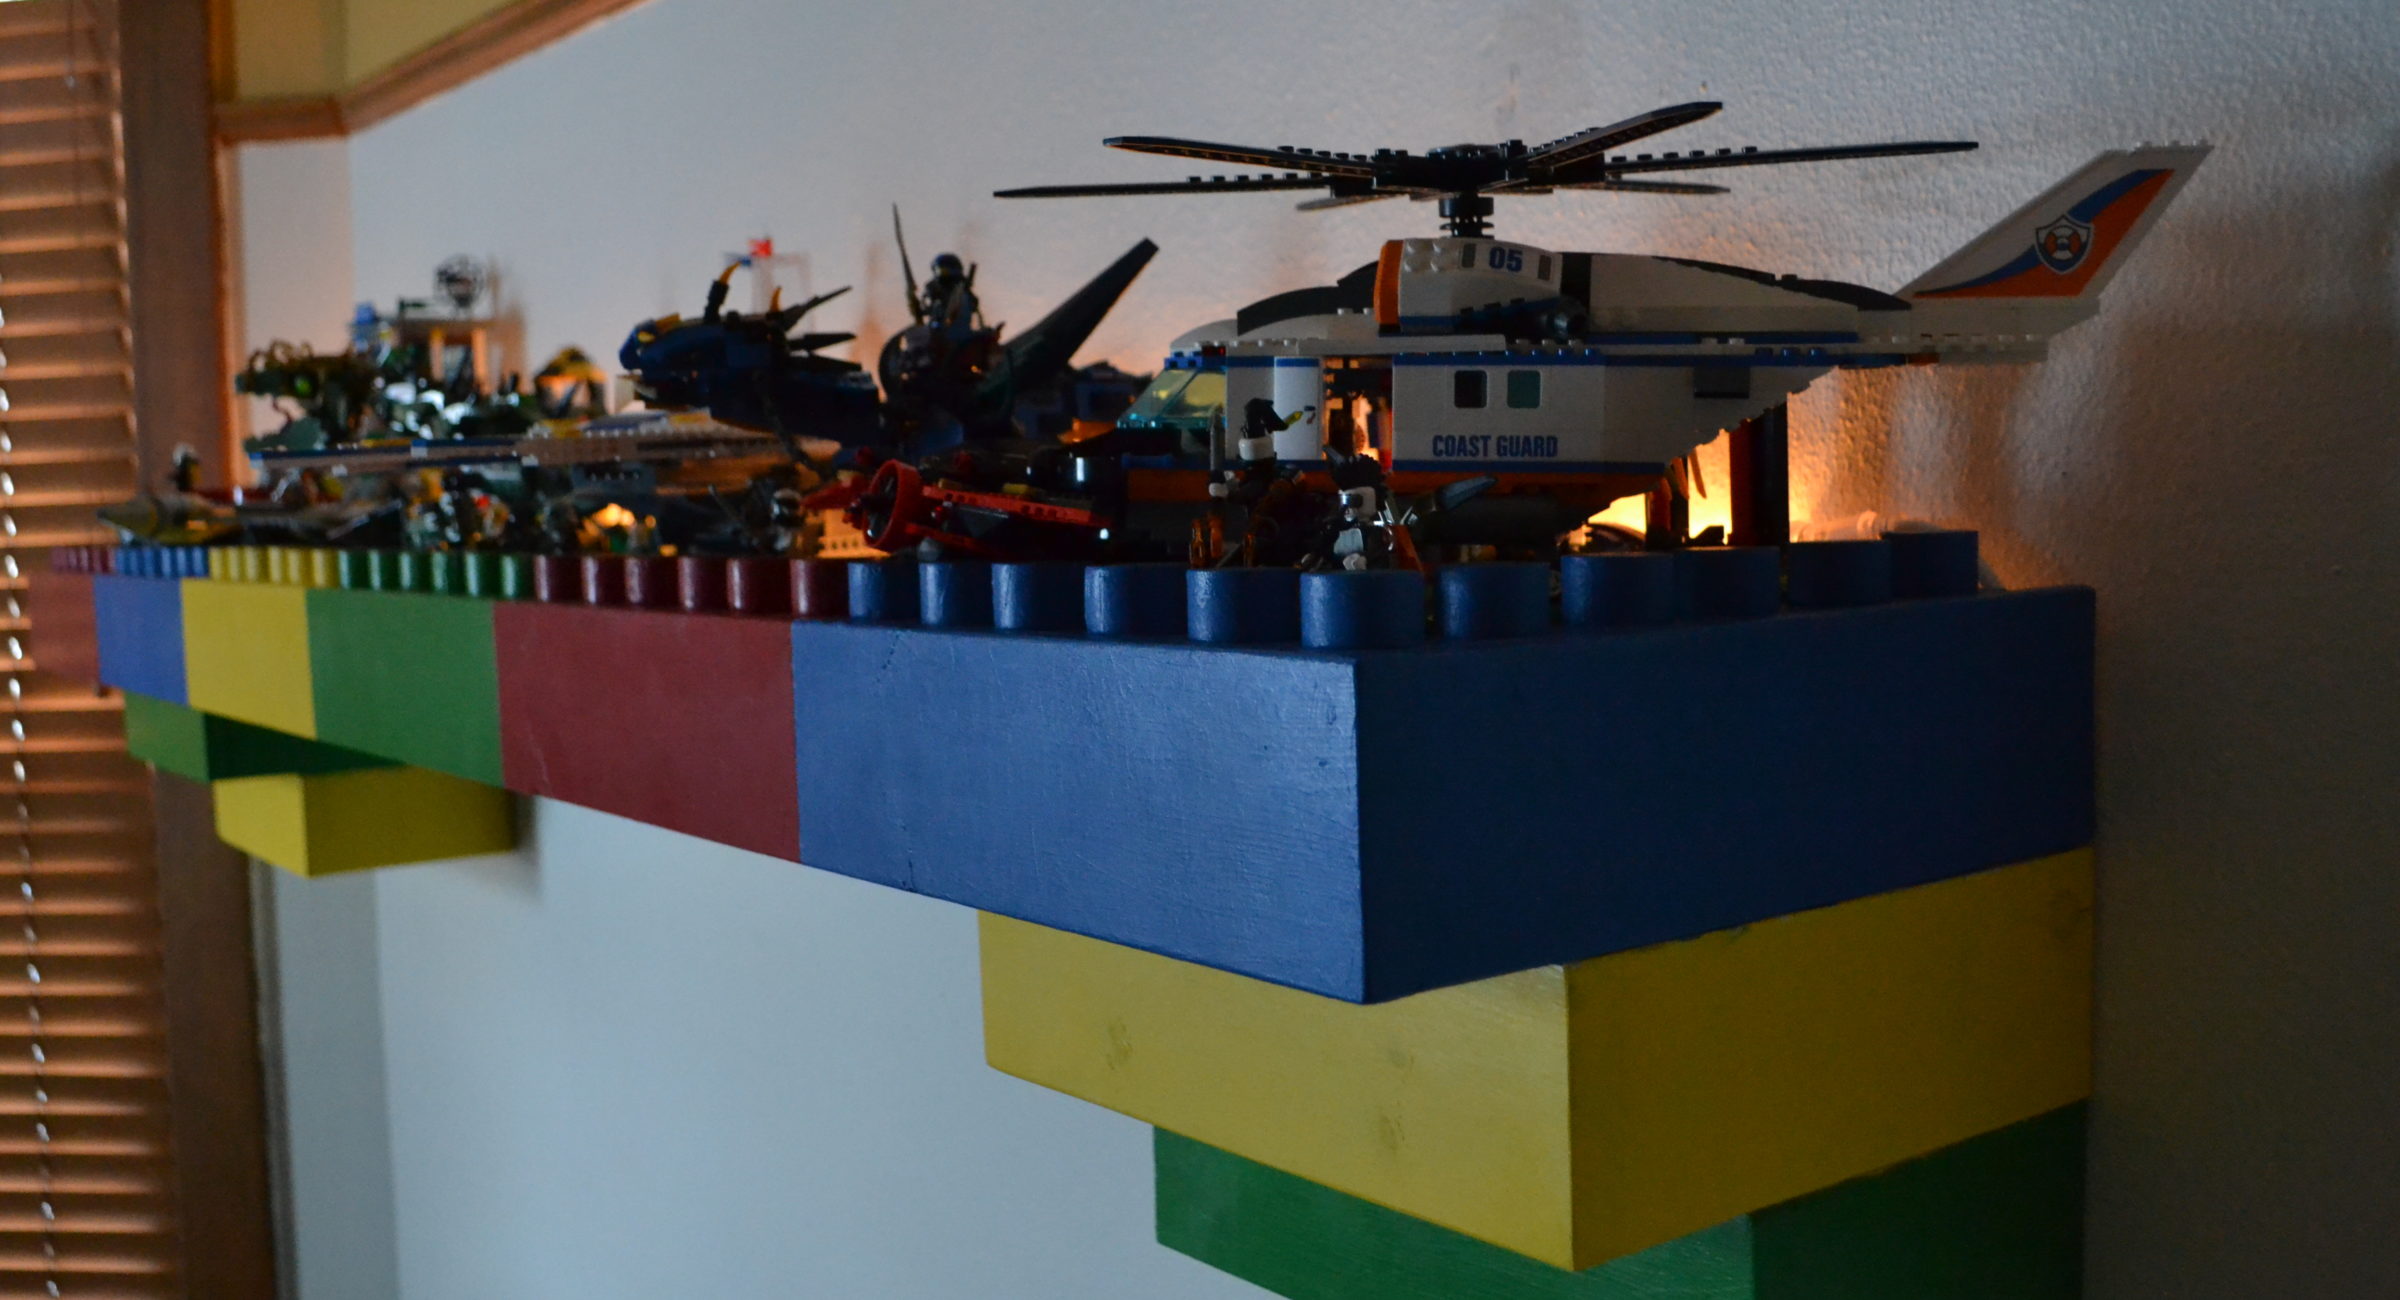
My boys love Legos. And for full disclosure, I love Legos as well. I’m a bit of a Lego junky. The first step is admitting you have a problem, and I have one. Now that we’ve got that on the table you probably understand my dilemma. We’ve got a lot of Legos and don’t have the space to put them. So my brilliant idea was to make a big Lego shelf. Not actually make it out of Legos (although that would actually be really cool), but try to make it look like it was made of giant Lego bricks.
With that I mind I made some sketches, and then I got a few pine 1×4’s and some hardboard. The idea was to make it look like a floating shelf, but also like it was a few layers of bricks, and that the top bricks would have pegs surrounding it.
And this thing ended up massive. It’s 6 feet long, and sticks out about 13” from the wall. On the sides it’s about 10.5” inches, as it’s really just three layers of 1×4’s. For the main shelf piece, I basically just built a frame as if you were just framing a wall. But the inside spacer slats I ripped down on the tablesaw by ¼” to match the thickness of the hardboard. That was so the hardboard would sit flush inside. Which also required me to rout out a ¼” slot in all the outside pieces.
The side pieces of the major frame I made stick out in the back ¾ of an inch. This was so I could later install a French cleat 1×4 along the back and have it all be flush with the wall. So likewise for the shelf arms or skirts, or whatever they’re called, they were also lined up with those back pieces that were ¾” longer than the rest of the frame.
My intent was to use pocket holes on the inside of the side skirts so they’d never be visible. But this is where I screwed up. I went ahead and put those individual boxes together, including the bottom hardboard pieces, woodglueing them and patching with wood putty. Oops. Once that was done I could no longer get to the pocket holes to attach them to each other and to the main shelf piece. I literally boxed myself in. So, to fix it, I just decided on pocket holes on the outside of those boxes. I knew I was priming and painting anyway, so as long as I did a good job filling the pocket holes and sanding it probably wouldn’t be noticeable, and in the end they’re really hard to notice.

For the pegs, I took a 1- ¼” dowel, and cut it into ¾” pieces. Probably about 50 or so but I honestly haven’t counted. The worst part of this project was sanding all those pieces on the orbital sander in 20-degree temps. I just eyeballed it when lining them up on the shelf, and then I used construction adhesive to glue them down. Watch the video and you’ll see what big helpers the boys were during that process.
I primed and painted, and the painting on this project was a blast. I ended up putting the boys to work, and they had a great time getting to paint their favorite colors on the Lego shelf. It was funny that they were a bit worried about messing it up, but I told them it was going to be so cool to always be able to point at that shelf on the wall and be able to say, “I helped make that!” We decided on just doing some basic colors: red, blue, green, and yellow.
Once painted, I used spray polyurethane, oil based. It’s a bit more expensive to buy the spray, but totally worth it for a project like this when I really had no desire to try and brush between all those pegs on the top of the shelf. And because I am a bit lazy, I just finished the bottom with the spray can, too. Hey, no streaking and no dripping poly. I might use this stuff a lot more.
With the hard stuff done, I attached the French cleat to the back, and put the other cleat on the wall, making sure that I was hitting the studs and using 3” screws. The cleat that went on the back of the shelf I recessed about an inch below the shelf, and that was so I could run a rope light across the back of the shelf. I then used a box knife to cut some Lego mats down to size and glued them down to the top of the shelf. Needed to be able to stand up our coolest figures on the shelf, of course!
And then we hung it on the wall and decked it out with our finest Lego sets. It sits above the couch, but it’s reachable for the boys so they can get them down whenever they want to play with them. Now, we just need to build about 7 more of these!
Thanks for reading and watching!
Cheers!
Grant