This is how I built a Dragon Nightlight. My wife had a friend asking for this for her daughter. She wanted a dragon, and wanted it to be black and purple. So, I came up with a design to have a 2’ x 2’ base with purple LED lights come from behind a black dragon in the middle and from underneath the outer black frame.
I chose to do a kind of layered frame here. The base is 2’ x 2’, made of 1” strips that I ripped down on the tablesaw. I then routed a ¼” edge for the ¼” hardboard to sit inside. Once that was all glued and nailed together, I made another frame with the 1×4’s that would be the same size on the outside, but the inside would overlap. This is so I can later add LED lights on the inside, so that they won’t be seen but will shine light towards the center of the piece.
The dragon was done on the scrollsaw out of ¼” hardboard. I used the same trick I always do to adhere the drawing to the board: cover it with painter’s tape, spray with spray adhesive, and stick the drawing down. Once all the cutting is done, just peel the tape of and there’s no sticky residue. After scrolling I just smoothed out any rough spots with a file.
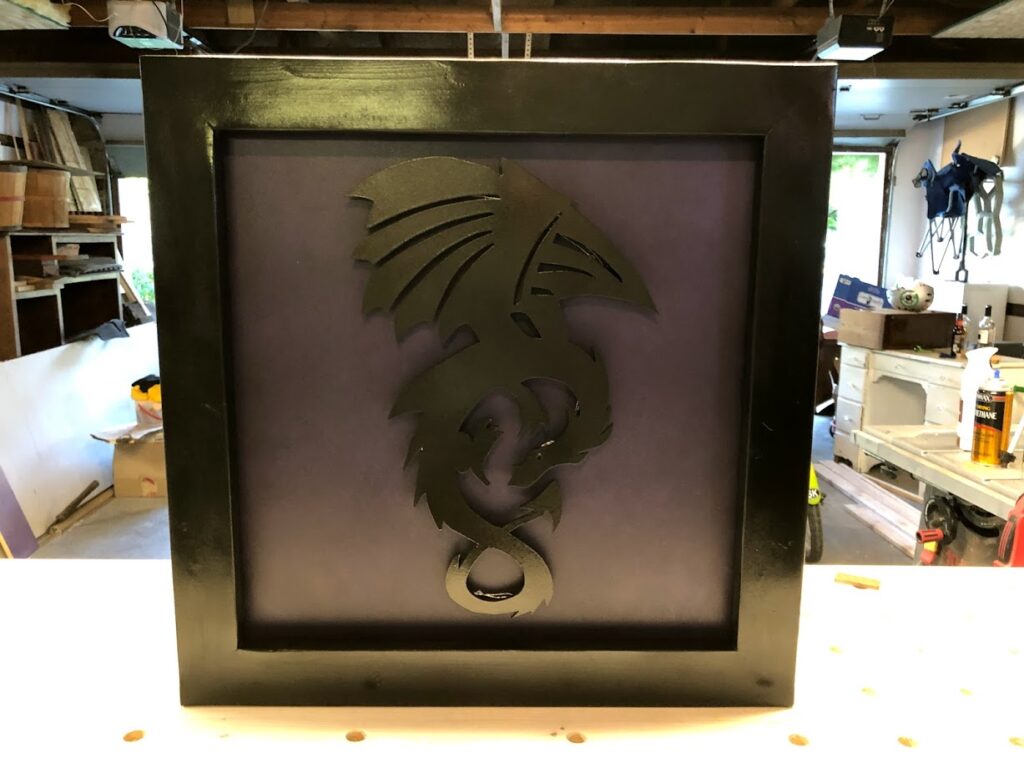
The frame and dragon were primed with spray primer, and then sanded smooth. Then I used a few different sprays until I got the look I liked. I ultimately went with a purple background, a matte black frame, and hammered black spray dragon. For the purple back, I actually did the hammered black first to give it some rough texture, and then just did some light spraying of the purple from a distance. Turned out pretty good. Once everything was colored, I hit it with spray polyurethane.
I cut some little triangle pieces to put in each corner of the base so that I had something to wrap the copper LED string lights around. And I cut several smaller strips for the dragon to rest on, and that I could wrap the lights in and out of. I attached these using some Elmer’s pro bond glue.
I was able to find some purple lights on Amazon that came with a remote control and have a bunch of flashing options. I drilled a hole in one corner of the base and one close to the middle, both of which would end up concealed by the outer frame and the dragon. I rand the lights through the corner hole and wrapped around the outside a couple times, and then ran it back through that outer hole, and then ran it through the middle hole and wrapped around the dragon spacers until the end of the string.
With the lights in place. I attached the outer frame by screwing it together from the back of the base. I used a countersink bit on the back first to make sure the screws sat flush. Then just clamped the base to the outer frame to hold it steady and drilled the screws in. To attach the dragon, I used Velcro strips that I cut to fit on top of the spaces on the base. I just think this is better than gluing the dragon down, in case the lights ever go bad and need replaced. Or maybe a new dragon will be in order someday?

Thanks for reading and watching!
Cheers,
Grant
Items used:
Ryobi 1.2 Amp 16 in. Corded Scroll Saw
¼” hardboard
1 x 4 pine lumber
Primer
Spray paint
Tools: Drill, tablesaw, miter saw, scrollsaw, brad nailer