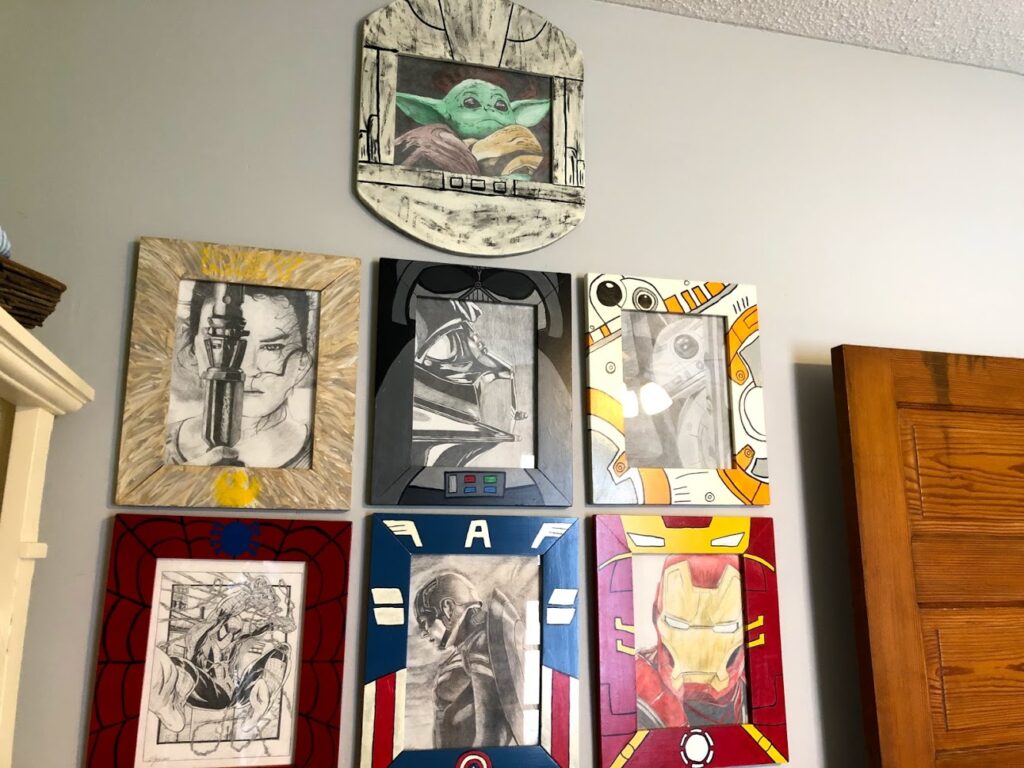
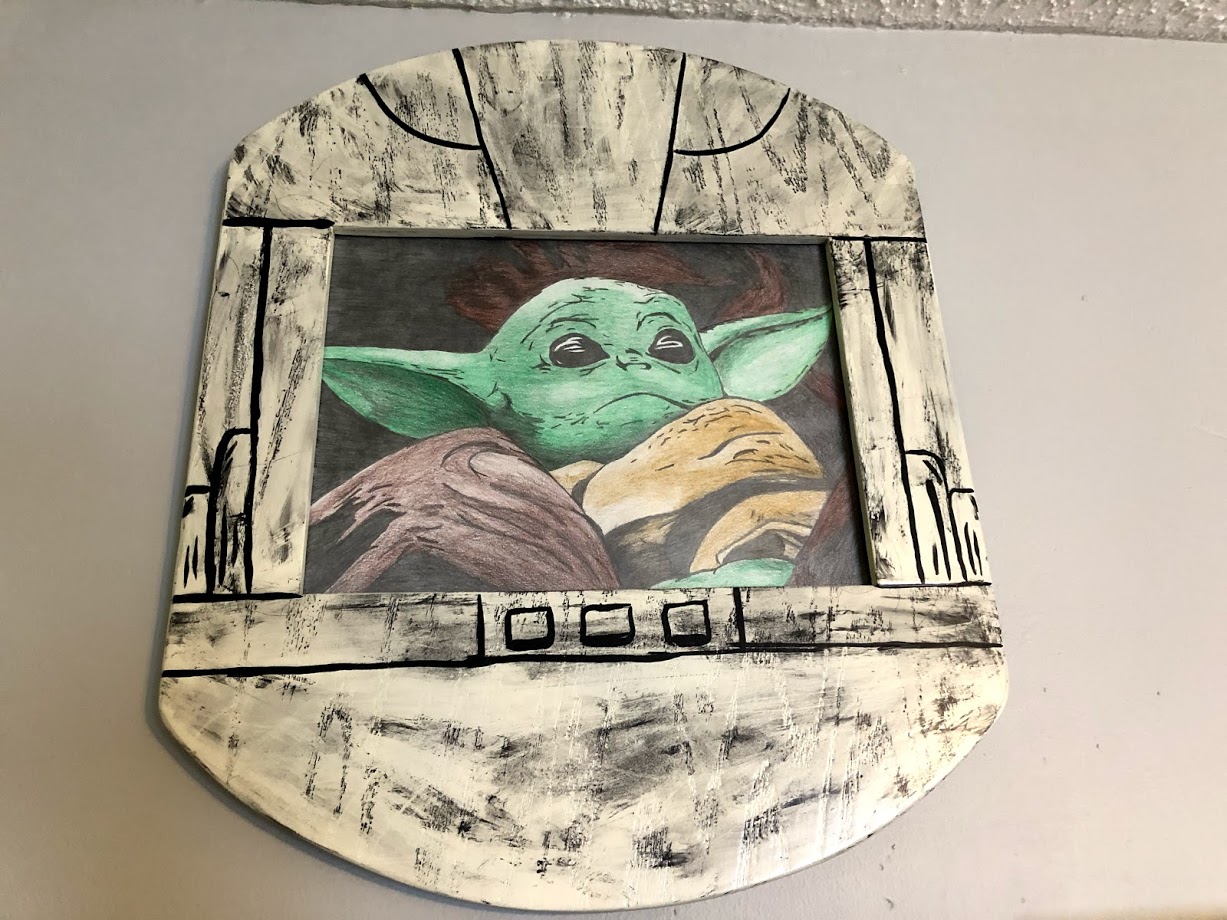
I happen to dabble in drawing from time to time, and have created several Star Wars and Marvel portraits over the years for my boys. And for each drawing, I do a custom frame that fits in with the character. Once I saw the first episode of The Mandalorian, I knew I had to do a drawing of The Child, aka Baby Yoda. So once my drawing was complete, it needed a fitting frame. And what could be better than trying to make the frame look like the pod that little Baby Yoda was resting so peacefully in when Mando first laid eyes on him (and protected him by blasting IG-11 in his robot head).
Baby Yoda is #7 in a series that includes Rey, BB-8, Darth Vader, Spider-Man, Iron Man, and Captain America.
I started out with a scrap of oak plywood (more on that material choice later) and just ripped down a couple strips for the side at 2.5″. Then I cut a couple bigger sections, hopefully leaving enough to make a round shape. I struggled for a bit finding a big enough circle template, but settled on my garbage can lid to draw out a partial section over my bigger section. I cut that out on the bandsaw, and then I went back to my other section and drew the outline of the first piece so they’d match exactly. I cut that piece out and then did some sanding.
I routed out a 1/4″ section on the inside of each piece for the edge that the glass and the artwork would sit in. I made a mistake here of routing all the way across the bigger sections, which meant I would be left with a little 1/4″ hole on each joint that would look pretty back. But since this was going to be painted, it was an easy fix. Once I joined the frame together with pocket holes/screws, I cut some scraps into little pieces about 1/4″ wide and glued them into those gaps. Once dry, I dabbed some wood glue around them along with some sawdust. And once that dried, I sanded everything smooth.
My painting method for making it look distressed and weathered is really simple. Once my base of ivory spray paint was dry, I simply dab on some black acrylic paint and quickly to rub it in with a paper towel. The more you rub, the lighter it gets. You just can’t wait for it to dry at all. If I were to do this frame over again, I would probably avoid using the oak plywood that I used. It was what I had laying around so I went with it. But I say I’d avoid it because the wood grains were really evident. For this project, it didn’t matter too much and actually kind of added to the weathering effect. But if I didn’t want to weather it, they would have been really noticeable.
With the weathering done, I painted on some black lines to match some of the detail of the pod from the show. Once that was all dry, I used spray-on polyurethane, semi-gloss, for finish. For the glass, I always go to my local hardware store and have them cut me a section that matches the size of my art piece, 9×12 in this case, and that usually only costs a couple bucks. And for the backer I just cut a scrap piece of cardboard to fit, and then use some glazier points to hold it all in place. Tack on a picture frame hanger to the back, and you’re all done.

.Now The Child hangs proudly in his little floating pod, keeping watch over my boys. You never know when a group of Imperial supporters will show up and he’ll need to do the magic hand thing. This is the way.
What Star Wars character, super hero, or super villain do you think I should do next? Let me know by leaving a comment in the YouTube video embedded above!
Thanks for reading and watching! Cheers!
Grant