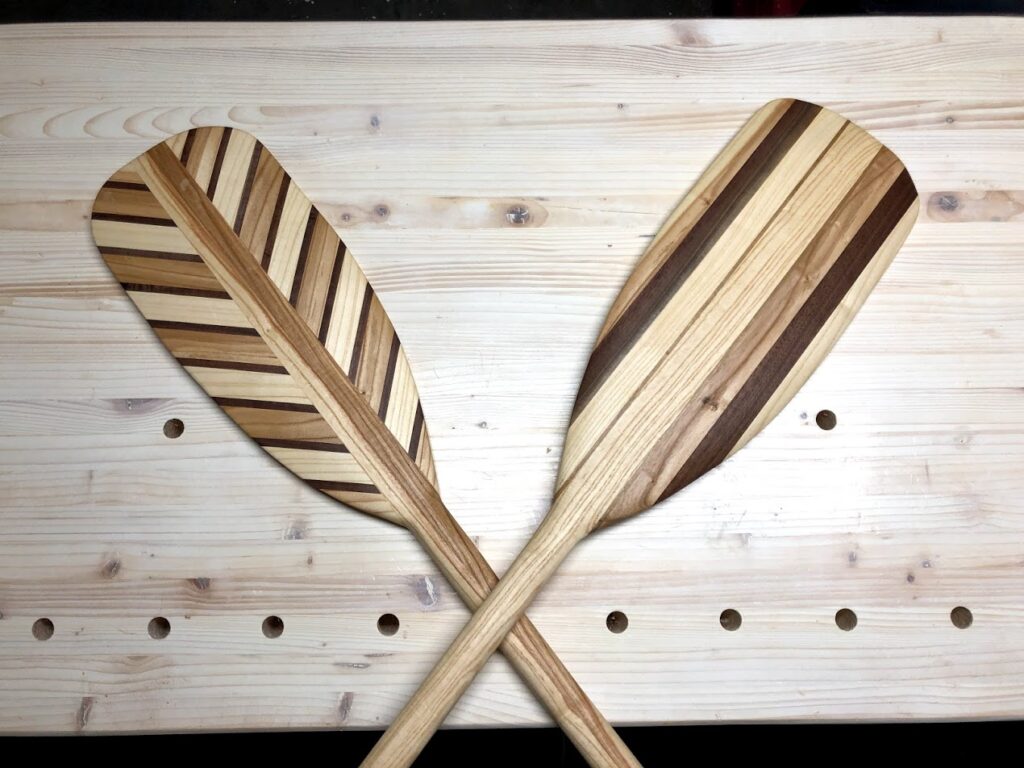
I got my wife a canoe for her birthday a couple years back, and along with it came some cheap canoe paddles. As a modest woodworker, and a bearded man, it has obviously been a goal of mine ever since to build a couple canoe paddles of my own. So that’s what I did. Here’s how.
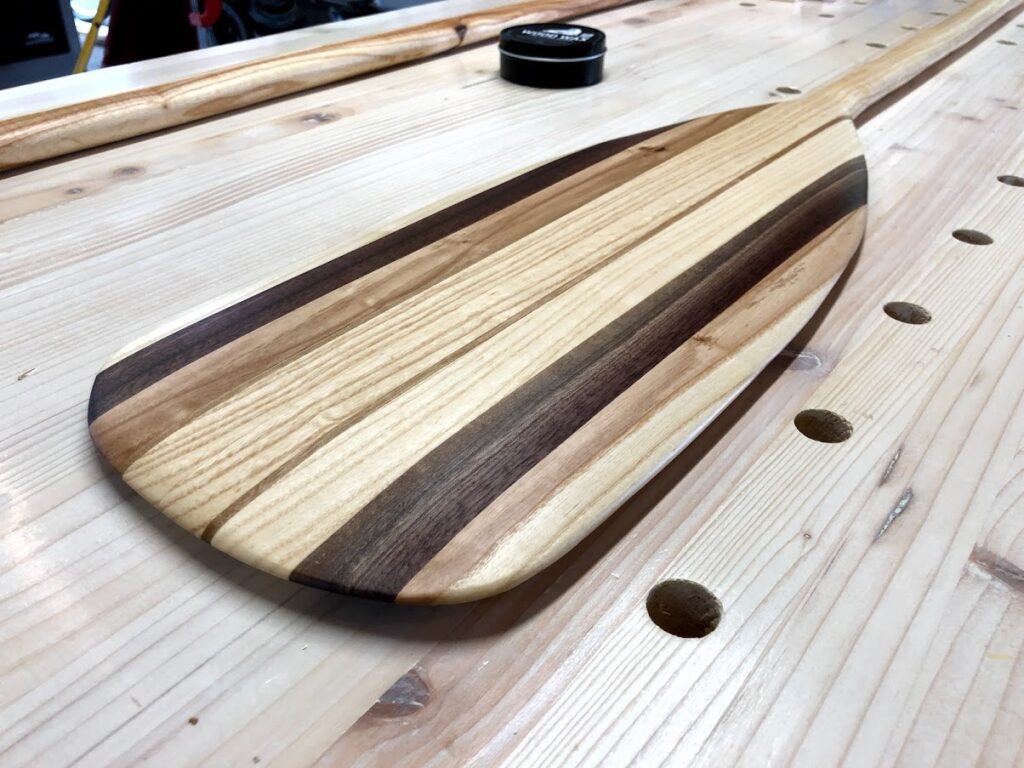
I started by picking up some hardwood from my local supplier. I went with walnut and ash, and I got enough to do two paddles. For design, let’s talk one paddle at a time. The handle is two 1 ½” strips glued together, and about as long as up to my chin. Why that tall? Because that’s what the canoe rental guy did when I was in Boundary Waters this summer and it seemed to fit nicely. Then I measured the paddle size of my cheapo paddle and cut up some 1” strips of walnut and ash to make an alternating pattern. I had several ¼” strips of walnut laying around, so I mixed those in as well. I glued those up at one end of the paddle like a cutting board with a 5’ handle in the middle. Then I glued a couple 1” thick walnut pieces that were about 3 or 4” long to the other end for the handle.
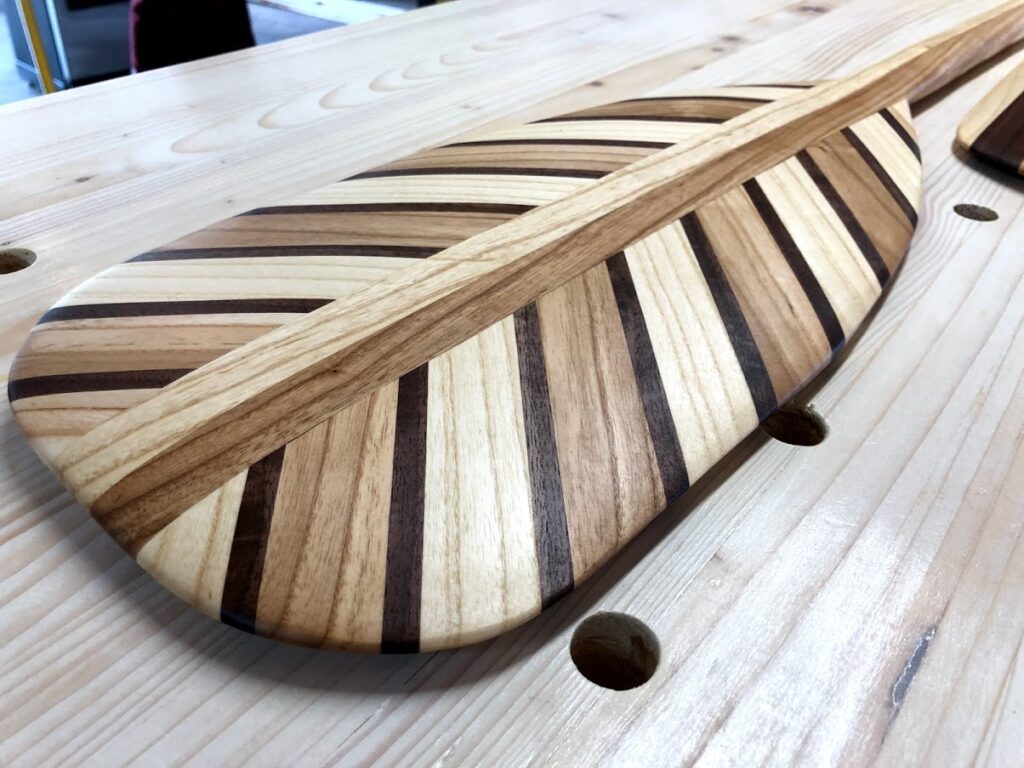
For the other board I decided to get more complicated and go for a feather look. So I cut more 1” strips of ash, probably around 15” or so. Then I cut a bunch of ¼” strips of walnut and made them the same length. I glued them up, just alternating ash and walnut. Some of the ash was darker than other pieces, so I alternated those as well. Also, when I did the gluing, I made it uneven so that it basically was glued at a 45-degree angle. I just used my speed square to keep it close to an even 45. Once the glue was dry, I used the speed square to draw a cut line on one end, and I used my circular saw with a straight edge clamped down. That gave me a perfectly straight cut with the lines at the 45-degree angle I wanted. Then I went to the tablesaw and cut two 3” sections. Then I glued a section to each side of the handle with the lines all running down. I had a couple smaller pieces with the lines and used those for the handle.
Once the glue dried, I ran the paddles through the planer to get things a bit smoother. Then I used my cheapo paddle again to trace the paddle shape on, as well as the handles. I then used the jigsaw to cut along my lines. This didn’t have to be perfect, because next was the carving. Now, if you want to be old school, I suppose this is where you can get a hand plane and just go to town for a few hours to form your shape and narrow things down toward the ends of the paddles. But what is really old school about using a planer, miter saw, or tablesaw? So, I used an angle grinder with a wood carving disc on it. If you don’t know what that is, well I didn’t either. I told my neighbor what I was wanting to do and he said he heard they had these discs that look like a chainsaw blade. I found one on Amazon for about $15, and oh boy does this thing make the hardwood fly off. This thing is equal parts fun and terrifying. But it made a giant mess and quick work of my paddles. It leaves all kinds of gauges in the wood, even after I practices and got better as I went. So once that was done, I switched to a 60 grit flap disc (about $4 at the local hardware store) and smoothed out all the gouges. I should note, I recommend doing all this carving work outside, because there is no way to avoid the wood chips and sawdust from going everywhere. Huge mess.
Then I went to the orbital sander and tried to get things as smooth as possible. I also had to use some files to do the smoothing work around the handles. There was some back and forth here between orbital and flap disc to get things to look right. I used a pencil to draw some marks on the high spots and then would go back over them. One more thing I will note is that these did not end up perfect. I’m sure I could have done a lot more of this and smoothed things out much better, but honestly, I knew these were just for me and my wife. If I were selling them, I would have tried harder. But these are for us, and I’m not bothered in the least by some waves and bumps on the handles and paddles. Imperfect, just like me.
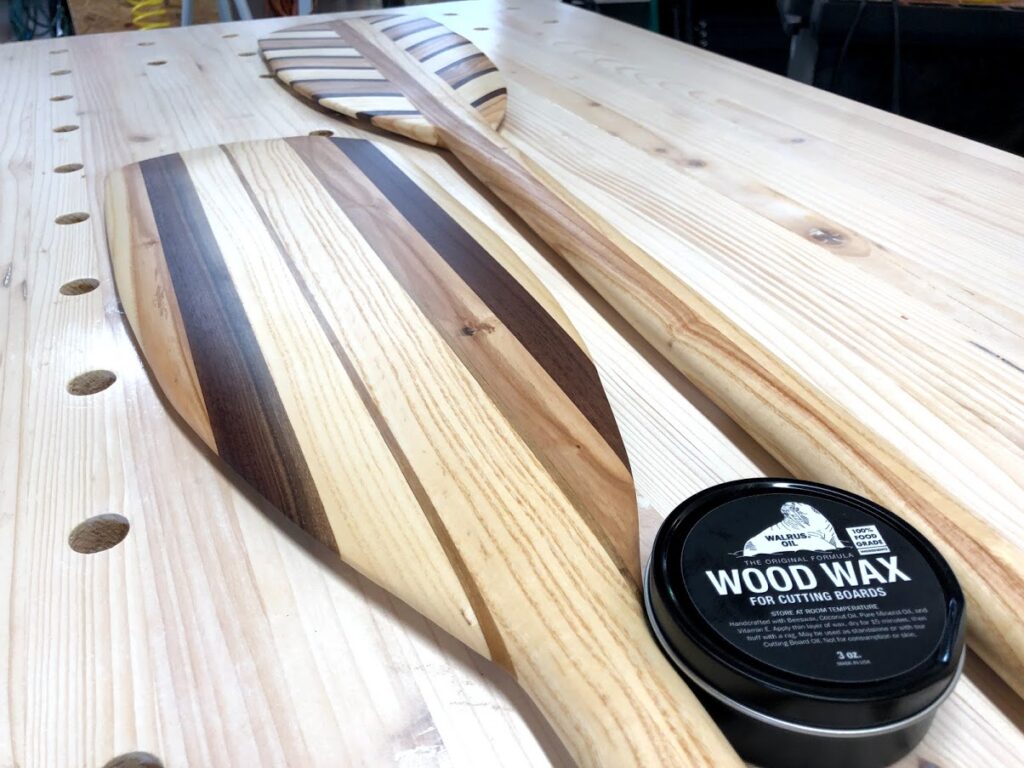
For finish I didn’t know what to use, but I did want somewhat of a natural finished look. I know some folks and the pros probably use some thick gloss. But I saw another maker on Instagram used Danish Oil followed by Walrus Oil’s cutting board wax. So that’s what I did, and I think they look great. And they’ve also passed the strength test, as not only did my son drop them twice, but they fell off my knew paddle rack I made and bounced off the concrete. Still in one piece! Tightbond III is the real deal!
If you try this on your own, I’d definitely do the angle grinder method. I think you can totally do this without a planer. And don’t get discouraged if when you do you glue up it feels like your paddle weighs 50 pounds. It will feel a lot different after the carving, and I was amazed how lightweight if felt once done. I’m very pleased with the finished product. Fun project, and something I’ll get use out of for years to come. And I’ll likely be doing this again soon, as the boys say they want to make their own!
Items Used:
DEWALT DW8308 4-1/2-Inches x 7/8-Inches 60 Grit Zirconia Angle Grinder Flap Disc
Titebond 1413 III Ultimate Wood Glue, 8-Ounces
Walnut
Ash
Tools used: Tablesaw, Miter saw, Angle grinder, Orbital Sander, Jigsaw, Planer
Thanks for reading and watching!
Cheers!
Grant