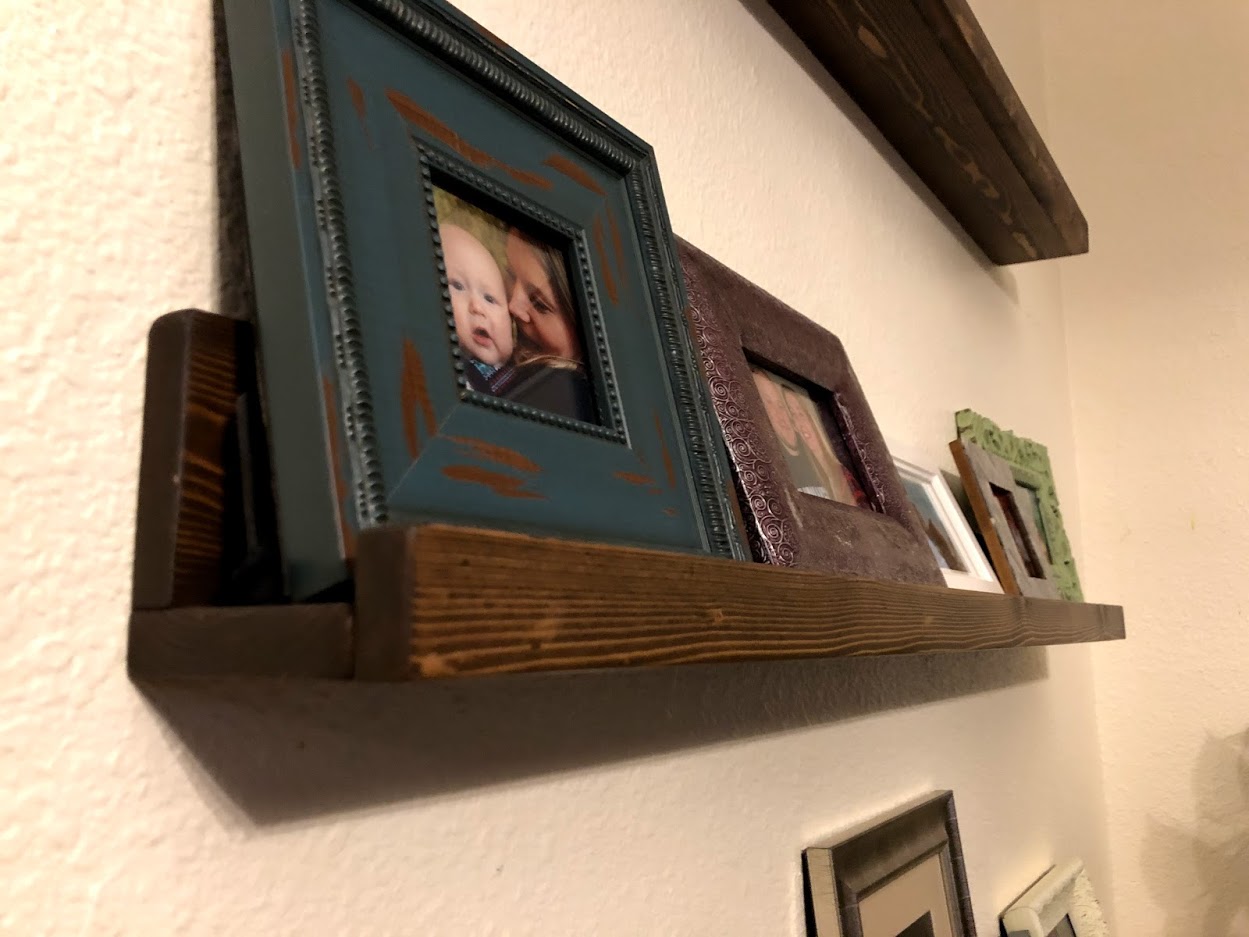
This is a really simple DIY woodworking project that any beginner can do. My wife wanted some shelves for our dining room that had a lip so she could rest picture frames on them and not have them slide forward and fall. She wanted three so that’s what I made. Cheap pine, a few wood screws and brad nails, some wood glue and putty, some stain and poly, and you’re done. I used a miter saw and tablesaw, but this is certainly something you could do with a handsaw if you’re limited on tools. This is a one-day build, other than waiting for the stain to dry to do the polyurethane; and probably letting the poly dry before you try to hang on the wall, but you get it.
The following are my measurements, but you can make these as long or short as you need in order to fit your space. We just took a tape measurer to our dining room wall and went with a length that looked good.
Measurements:
Length: 44”
Height: 4 ¼”
Depth: 3 ½”
Front lip height: 1 ½”
Cut List for 3 shelves, from 4 pine 1×4’s:
Pine 1×4’s
6 at 44”
Pine 1×2’s (you can rip these down from 1×4’s, or if you don’t own a tablesaw you can buy these at any big box store).
3 at 44”
Step 1: cut everything down to size and sand it all. As noted above, I used a tablesaw to rip down some boards to 1 ½”, but you can always buy thinner boards if you don’t own a tablesaw.
Step 2: attach the boards together. For this design she wanted the back taller than she wanted it wide. Both the back and the shelf are the same width (3.5”), so I stacked the back on top of the shelf piece. I drilled holes up from the bottom and used a countersink bit to hide the screwheads. I wood-glued and then screwed them in. I then filled the holes with wood putty and sanded them smooth once dry.
The front lip I stacked in front of the shelf piece so the seam wouldn’t be seen if you were looking straight at the shelf. To attach, I wood glued and brad nailed them in since they’re not really supporting any weight. And again, I used wood putty on the brad nail holes and sanded smooth.
Step 3: stain and poly. I used Dark Walnut stain, but you could choose whatever shade you desire. I applied two coats, applying with a foam brush and wiping it down after a few minutes with shop rags. The following day, I used spray can polyurethane, and my wife chose a satin finish. I usually prefer semi-gloss, but she’s the boss when it comes to home décor. Once the poly was dry, I gave it all a rub with steel wool, and then wiped it off with a wet rag.
Step 4: mount to your wall. I decided to screw right through the backing of the shelf, knowing that we are using these for displaying picture frames which will more than likely hid the screw holes. If you’re planning on displaying things that are smaller or more spaced out, you could always use a keyhole router bit to cut into the back some spots to fit hanging screws. But I just found the studs in my wall, had my wife tell me the height, and then lined it all up with a level and a tape measurer. I drilled and screwed them all in, and we’re done.
My wife then got to put the final touches on it by adding frames. Please try not to look to closely at the photos in the frames, as some might possibly still be stock photos that maybe came with the frame. We’ve still got some work to do when it comes to picking out photos and getting them printed. The funny thing is that will take longer than this project did!
Thanks for reading and watching!
Cheers!
Grant
