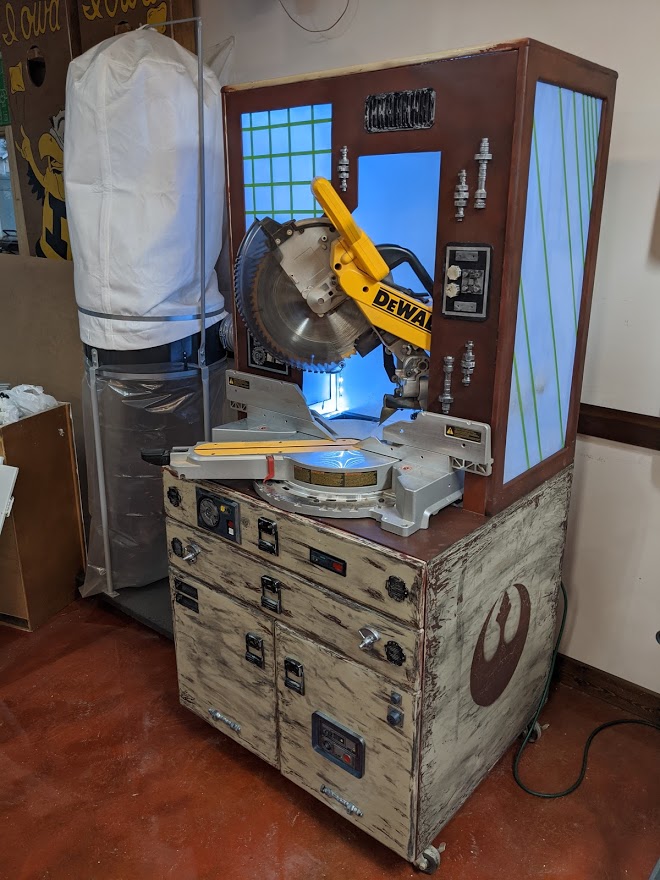
I wanted a new miter saw station and it needed three things: 1. Be mobile 2. Have good dust collection, and 3. Look like it came out of Star Wars! And this beautiful contraption is what I came up with!
Before I go through all of the aspects of the build, here are the general dimensions:
Total height: 64 1/4″
Box: depth – 27 1/2″, width – 31 1/2″, height – 29″
Hood: depth – 17″, width – 31 1/2″, height – 35 1/4″
Drawers: depth – 19 3/4″, width – 29″, height – 4″
Drawer faces: 31 1/2″ x 5 1/2″
Cabinet faces: width – 15 1/2″, height – 17 1/2″
Castors: 3″
And for reference, I own a 12″ DeWalt compound miter saw, which is about 26″ wide.
Part 1
In Part 1 of the build I cover…
The Box: 2:19
Filling the wood grain: 7:29
The Dust Hood: 8:38
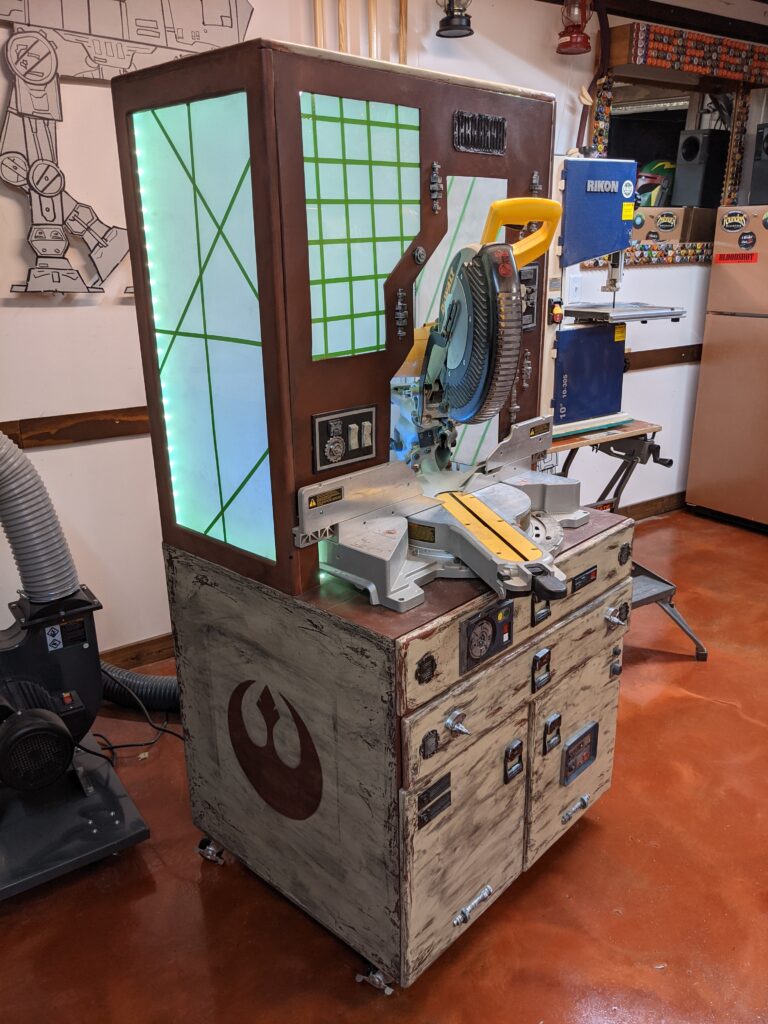
The Box
The cabinet is made from two sheets of ¾” plywood. With that, there was a lot of ripping down parts. I definitely should have used a straight edge, but I thought, hey, it’s a Star Wars cabinet and doesn’t have to be perfect. But just having perfectly straight edges makes it so much easier when you’re screwing everything together.
I used lots of pocket holes. If you don’t like pocket holes, you’re in the wrong place. They’re functional and they’re easy. Plus, I designed the layout so they’re all either on the back of the cabinet or on the inside. And all my friends call me pocket hole!
I designed this with two big drawers and then cabinet space on the bottom. The drawers are a bit shallow to leave space for dust collection tubing (but more on that later). There are probably better videos out there for drawer creation and assembly if you’re looking for that.
I like to use a roundover bit on the router on my edges to round everything off.
I screwed simple 3” locking casters onto the bottom, so this thing will be easy to move around the shop whenever I decide to rearrange things.
Everything got a coat of primer and sanded clean for later painting. I rolled it and brushed it on cuz it’s a big cabinet. I also used Rustoleum red flat spray primer (more on that when I get to the weathering portion of the build).
Filling Wood Grain
I stole this technique from Michael Alm, so you should go watch his video if you want the full rundown on how to make plywood look like metal.
So you do one coat of Shellac, and once dry do a light sanding. Then wood putty, then sand again.
This is a lot of extra work. If you have the money or resources, just use MDF and save yourself the headache, because this was a lot of extra time.
The Hood
The back was already in place from our big piece on the original box. The sides are essentially just windows, so I ripped down strips and made two windows. And then I just cut out one big flat piece to form a roof for it. The front was cut from 1/4 plywood and I had to make a cardboard template and do some testing to make sure the saw could cut still and not hit the sides. More to come later on how that fits in and fastens to the front.
Part 2
In Part 2 I cover…
Weathering: 1:30
The Greebles: 6:13
Weathering
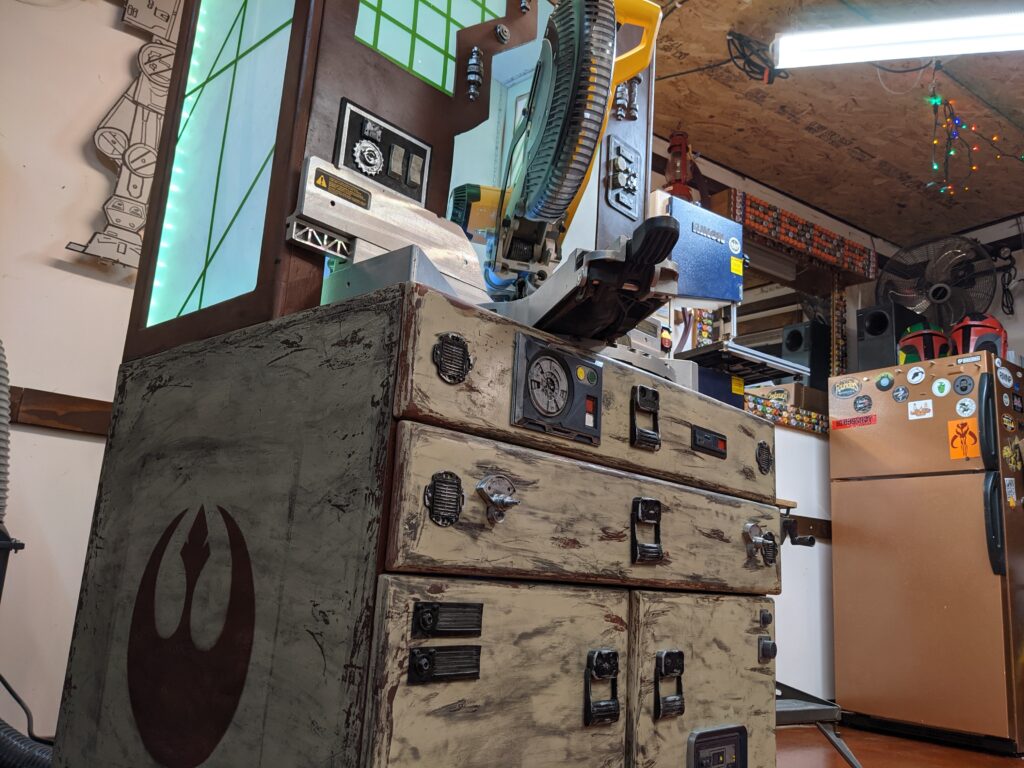
Firs, I coat everything with a layer of Rustoleum red flat primer. It’s not really red at all, but gives things a nice rust color. Then I coat the edges with rubber cement. These are the parts that I want to expose later. Then comes a layer of Rustoleum fossil spray paint. And once that’s dry enough to handle, I rub off the rubber cement with my finger or some sandpaper to expose the rust color beneath. And wallah, weathered! Then I just repeat those steps on all the pieces that I want to have this look.
 Paint weathering
For the drawers and fronts I just threw some black paint on and started rubbing it in with a paper towel and it escalated quickly. I’d suggest watering the paint down a bit and then starting on the edges and working your way in until you get the desired look. You don’t need a lot of paint for this, and less is definitely more. Lesson learned for me.
Rebel insignia
I couldn’t make a Rebel inspired station without putting a rebel insignia on it! So, I drew one up on a piece of hardboard and cut out a template on the scrollsaw. Then I taped it to each side and spray painted it on. A lot of people don’t know this – or maybe it was just me that didn’t know this – but if you read the fine print on the directions of Rustoleum spray paint it says to apply the second coat within 1 hour or after 24 hours. Weird right? Well, that’s because if the first coat cures at a slower pace underneath the second coat, then it will shrink the top surface and your paint will then start cracking. Which, for a Star Wars weathering project, is actually perfect! You can see this happen in the video almost immediately when I apply the red flat primer over the fossil color I had sprayed about two hours prior.
Greebles
Most every Greeble I added was 3D printed, but if you don’t own a 3D printer, I would encourage you to go check out The Smuggler’s Room and his videos on greebles. Anything can be a greeble! From computer components to orange juice lids! (Also, you should totally just buy a 3D printer because they’re’ amazing and I’m so glad I got one last year).
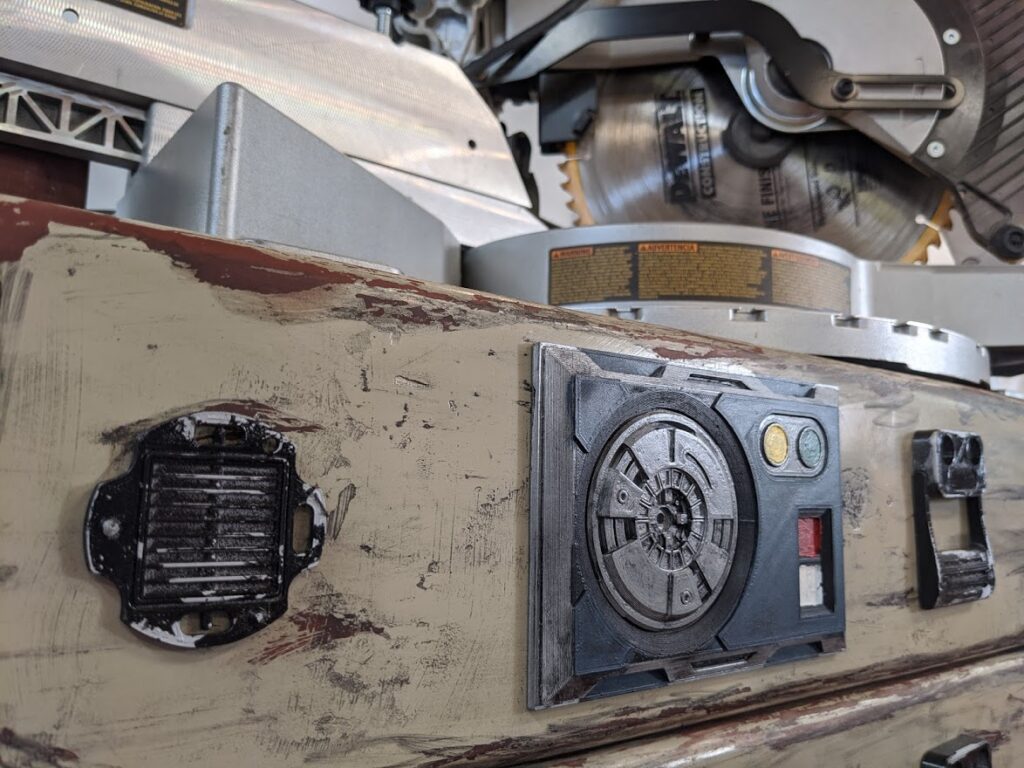
To weather the greebles, I painted them all with black primer; then I did a silver metallic coat over all of them. Then I did the same trick with the weathering, using rubber cement on the edges, letting it dry, and then painting everything gloss black. Once that was dry, I rubbed off the rubber cement to expose the metallic color underneath.
And then for some sections I wanted more silver so I used the really good metallic spray paint. Once I was done with the spray painting, I had to give all my silver shiny greebles the same weathering treatment, this time with watered down black paint lightly brushed on and rubbed in with a paper towel.
The drawer pulls I found on thingiverse weren’t really for a Star Wars project, but I thought they fit right in with everything else. And these screw into the front panels and worked well for both the drawers and cabinets.
The greebles that I couldn’t screw down, I just attached with super glue. I’m a big fan of the DAP rapid fuse; it’s strong and does indeed fuse rapidly!
Part 3
In Part 3 I cover:
Lighting and windows: 0:50
Dust collection: 5:31
Final assembly: 8:29
Lighting and Window Panels
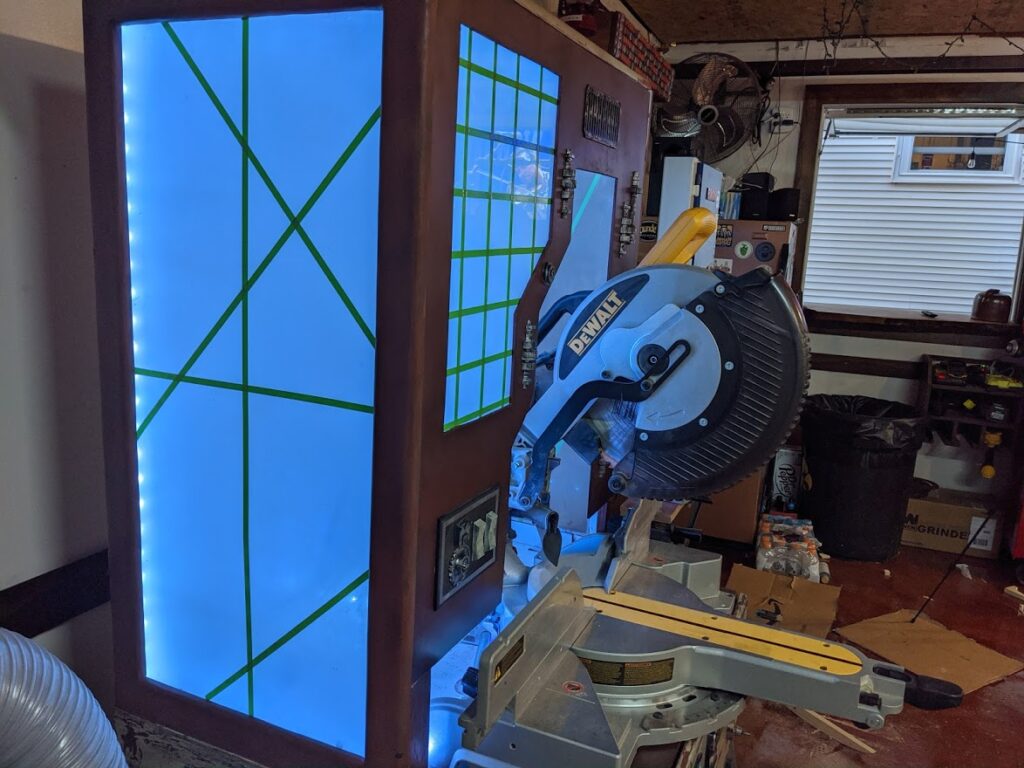
I routed out a channel the width of the light strip (1/2”). This was perfect because I kind of had to wedge the strip into the channel, and it was a snug enough fit that it should help them stay in place if they lose their stickiness over time. I purchased a 16.4’ LED light strip off of Amazon, and the size was just about perfect to wrap around the bottom, sides, and top of the hood, and then shoot back down through the hole I made for the power cable of the saw.
The window panels are made from plexi. I just got one big sheet of 1/4″ plexi that was 4′ x 4′, and then I cut it to fit with a jigsaw. You can use an acrylic cutting blade, but I find that a metal cutting blade works best with plexi to avoid it cracking. And then I just use little metal glazier points to fasten the windows into the frames. They hold them in place well and they’re easy enough to remove if I ever want to take the side windows off. The front window on the panel is epoxied in place. That one is likely never coming off. I used green pinstriping tape for the decorative lines across the windows. Since I don’t own a laser cutter, this was the best way I could think of to make the look of the Star Wars rebel stations you’ve seen in the movies. I used some glass frosting spray to dull the windows. I just didn’t like the look of them being totally see-through.
To finish the front panel, I did the same rust coloring painting and weathering techniques as described before. And then with weathering complete, I just had to super glue on my greebles. But to attach it in place, I had to make some additions to the hood. I cut some thin strips of pine for the sides and the top. And then I made two small blocks to attach to the bottom on each side of the hood. These bottom blocks give the saw something to back up against and give the removable panel two pieces to rest on. In the side rails, I drilled small holes about ¼” deep at the top and bottom. I epoxied in some nuts into those hole, and epoxied rare earth magnets onto the back side of the panel to line up with those nuts. These magnets hold the panel in place, and the panel hopefully keeps more dust inside the hood (and therefore sucked through the dust collection system). But if I ever need to make compound miter cuts, I can simply remove the front panel to make those cuts and easily snap it back in place when I’m done.
Dust collection
I got my new Dust Collector from Harbor Freight and I’ll link that model below. I also bought their accessory kit (also linked below) that includes extra hoses, connectors, and blast doors. It’s extra cash for the kit, but I plan on using every piece of that kit as I build out the dust collection system in my shop. I chose to do two connection points on the base behind the saw because, well, that’s what Bob did in his vid (linked below). And then I used the divider on the inside to route out to both ports. Maybe this would have worked well with one port down the middle, but I guess I’ll never know. I cut out a hole in the back of the cabinet with a jigsaw and used a blast door, because maybe that will be shut every once in a while when I add more dust collection throughout the shop? Then I just cut all of the dust collection hoses to size and clamped them in place.
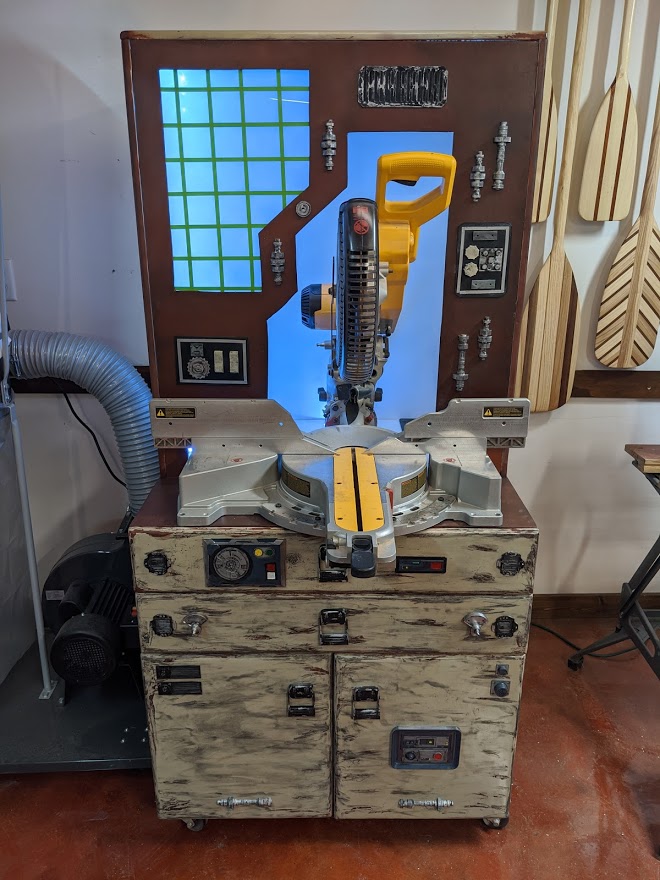
To sup things up a bit, I used a little contraption called an Automated Vacuum Switch. And it basically makes the power on your saw become the on button for your dust collector. So, when you kick your blade on, the dust collector fires up a half second later, and then after you turn the saw off, the dust collector will power down after 5 seconds. This thing was about fifty bucks on amazon, but the model I bought seems to have been discontinued. But if you search for ‘automated vacuum switch’ on Amazon you’ll come up with plenty of options to choose from.
Final Assembly
Putting in drawers, I always just kind of cross my fingers and hope everything fits as expected. Things rarely work out for me the first time. These actually fit! I cut it out of the video, but I did have to use some straps inside the cabinet to lockdown the dust collection tubing against the back of cabinet so the drawers would close all the way. In hindsight, I could have made them an inch shorter. But with the drawers in place, I simply screwed on the drawer faces and attached the cabinet doors and it was all done!
And with that, the Star Wars Miter Saw Station trilogy is complete! Hopefully, you’ve had a chance to watch all three videos! I’m so happy with how this turned out. Obviously, criticism some of you may already be thinking is “how are you cutting long boards you idiot?” Well, that will be the next project, building two more cabinets for the sides, and I have some ideas to not only make them functional, but also make them Star Wars. So, subscribe to the channel and click that bell and you’ll know when we put out new stuff!
Also, if there’s interest I may put a PDF together of build plans. Just reach out to me over on Instagram or Twitter, or you can leave a comment on the YouTube video and I’ll hook you up. If you have any ideas for improvements or for what to do next for the sides, I’d love to hear from you!
Cheers!
Grant
Links:
Michael Alm’s video on making plywood look like metal
I Like To Make Stuff’s miter saw station build
3D Print files:
Drawer pulls: https://www.thingiverse.com/thing:2830477
Droid access panel: https://www.thingiverse.com/thing:1777318
Star Wars greebles: https://www.thingiverse.com/thing:2884886
And the easiest way to find cool ones is just search “greeble” on thingiverse and browse around.
Items used:
Automated Vacuum Switch (no longer on amazon, but there are plenty there if you search)
Dust collector from Harbor Freight
Dust collection accessory kit from Harbor Freight
LED light strip from Amazon
2 sheets of 8’x4′ 3/4″ plywood
1/4″ plywood
3″ locking casters
Wood glue
Rustoleum flat red pray primer
Rustoleum fossil spray paint
White primer
Wood screw and pocket hole screws
DAP Rapid Fuse glue
PLA 3D printing filament
Rubber cement
Painter’s tape
1/4″ hardboard (for rebel insignia template)
Sand paper
Metalic spray paint
Black spray primer
Gloss black spray paint
Various acrylic paints
Tools used:
Miter saw, table saw, bandsaw, jigsaw, drills, Kreg jig, Kreg jig pocket hole clamp, scrollsaw, drill, router, pull saw, orbital sander, paint brushes