I have no idea what this game is actually called, but I’m going with Wooden Horse Racing Game. I don’t really understand the rules of the game, but I know it involves dice, poker chips, and a deck of cards, and players roll the dice to try to move their horse across the board the fastest, but rolling certain numbers causes more money to be dumped into the pot. I played it once, lost a lot of money, but had a good time. I’ve been wanting to make my own for about a year, so when a friend of mine reached out wanting one of these for her husband for his birthday, I decided to give it a shot.
I think this link is a good breakdown on how this game actually works.
The box itself is not overly complicated. It’s a box. It’s approximately 25” x 30”, and it has a divider about 6” from the top, and a small divider in that top section to make about a 6” box on the upper right. These sections are just to hold poker chips and the playing cards.
All parts on the box are made from red oak, which consisted of several 1 x 4’s and a 2’ x 4’ sheet of ½” plywood. I decided to go with dove tails for the joinery on the box. No real reason why, just thought it would look a bit cooler than just doing mitered corners. I cut the ½” plywood bottom to fit flush inside the 1 x 4’s. Then after cutting the inside pieces to size and doing the joinery, I ripped them down on the tablesaw to 3” in width so that they would fit flush inside the box. I form fit it all together, but didn’t glue anything up yet.
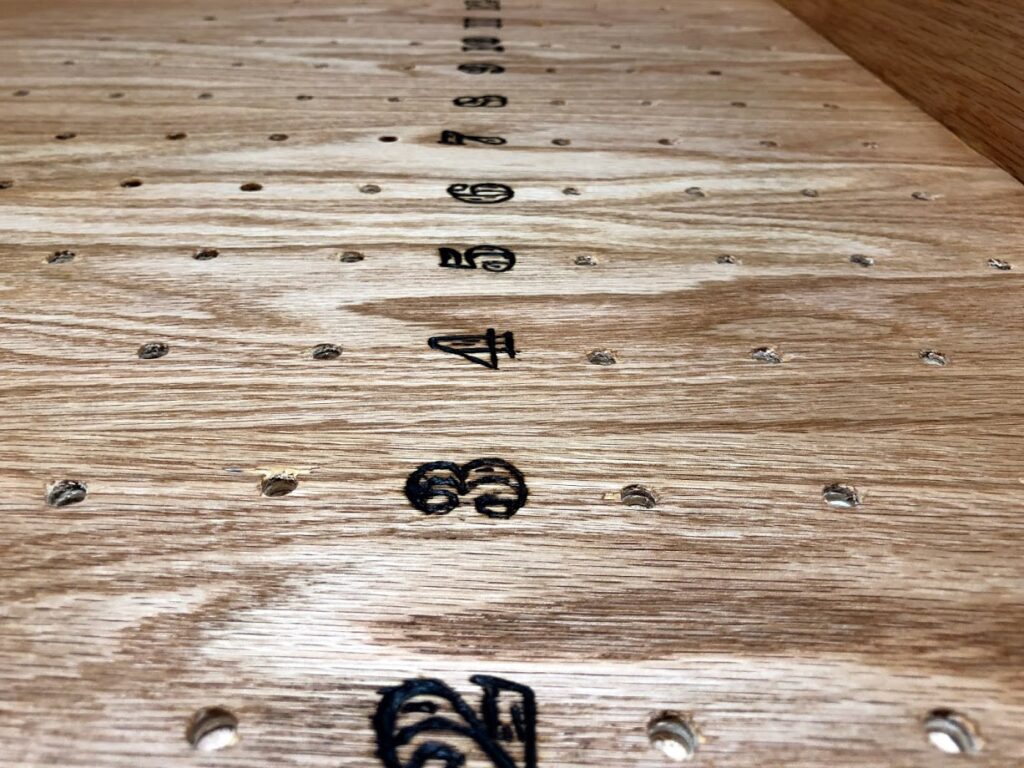
The next step was mapping out where all the holes, numbers, and letters belonged. So after drawing it out on a sheet of paper, I measured and marked everything up in pencil. For the letters and numbers, I found a font I liked in Word and then printed them off, cut them out, and used spray adhesive to stick them to the board. I then got my first experience using a wood burning pen. Needless to say, this was a bit more difficult and time consuming than I anticipated. I’m sure it’s a lot easier on softer wood, but the oak made this take a while. But I feel like it gave it a nice rustic feel much more than painting them on would have. With the letters done I moved onto drilling the holes. I used a piece of painter’s tape on my drill bit to make sure I didn’t go through the plywood. 50-some holes later and I was done, sanded everything up and moved on to the game pieces.
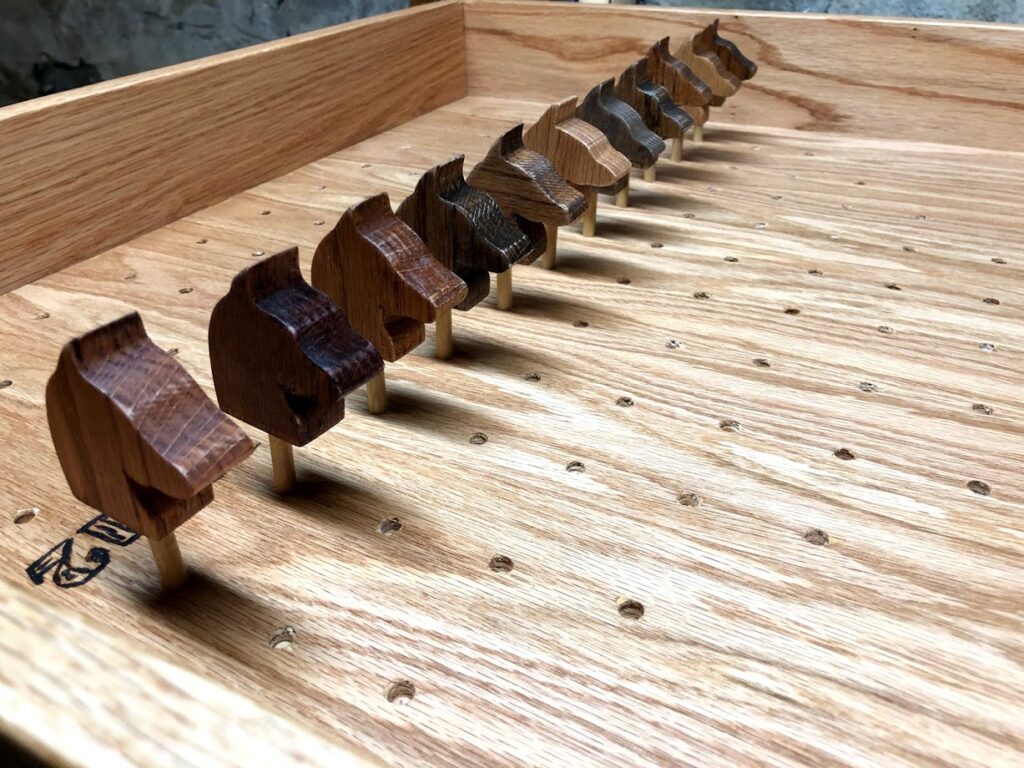
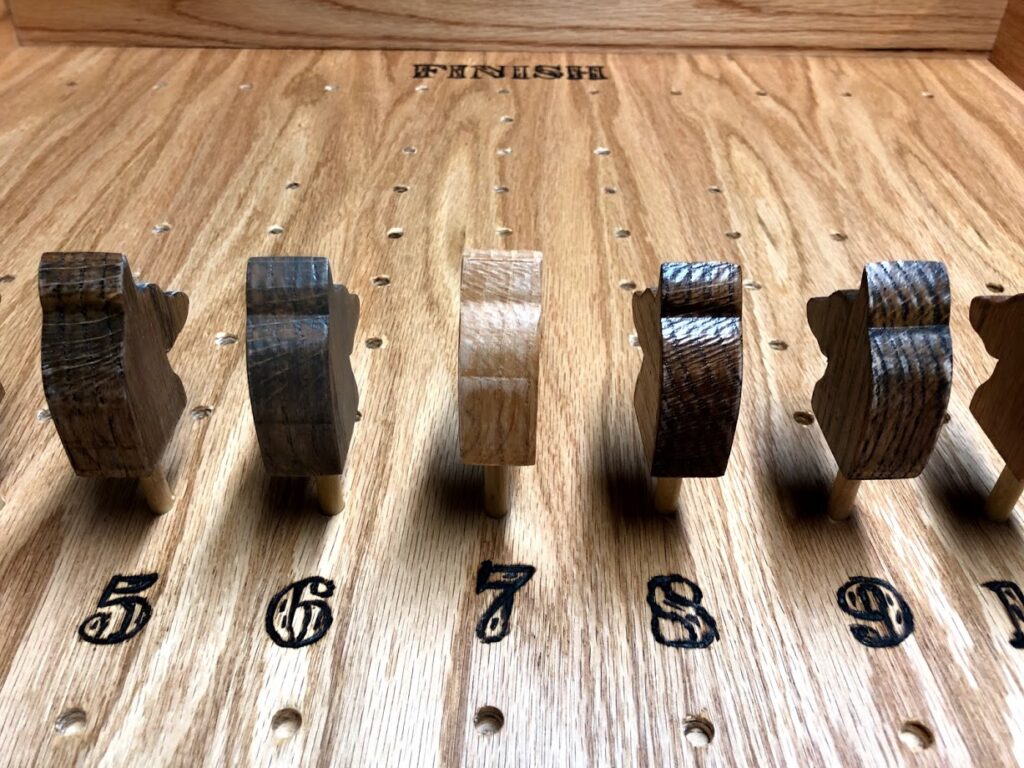
Now, for other boards I’ve seen little plastic horse racing figures. You can go buy these things at Hobby Lobby or probably from Amazon, but I wanted a bit of a unique feel to this. So I used my leftover oak and drew a horse head design, similar to a Knight chess piece. I cut out 11 of these on the scroll saw. Why 11? Well, because with dice you can only roll 2 through 12, hence the numbering on the board. Once cut, I sanded them all and then stained them each a different shade. I cut 3/8” dowels into small pieces, added a small drill hole to the bottom of each horse, and glued a dowel into each one. I then used some spray semi-gloss polyurethane to finish the pieces.
With all the board pieces decorated and sanded I glued it all together. To assist the glue, I made some pocket holes in the bottom of the base piece and used pocket hole screws to just pull everything tight. I then used a mix of wood glue and leftover sawdust from all of the dovetail routing, formed that into a putty and added it to the small gaps in the dovetails and joints. I also cut some triangular pieces for the bottom corners. They helped conceal the pocket holes and gave the board a bit of height off whatever surface it’s played on. More sanding and it was ready for finish.
I only used Danish Oil for finish. I could have used polyurethane here to really seal it up, but I didn’t want to leave any streaking or bubbling. And frankly, I just love the finish that Danish Oil provides. I just made sure to let my friend know not to use this thing as a coaster.
Things I learned:
- Having a scroll saw is a blast. This was the first time I got to use my new Ryobi, and I can’t wait for the next project. I think I may have to make some modifications to the saw, but I’m sure I’ll detail those out on the website as I do them.
- Woodburning is time consuming. But I’m also looking forward to doing more of this on future projects. Oh, and wear gloves. That thing gets hot.
- Remember to use painter’s tape when you’re ripping down a piece of plywood with a circular saw. I had some tear-out there that should have been prevented.
- This is definitely a repeatable project, but man could I really crank these things out if I had a CNC. Some day!
Items used:
- Red Oak plywood and 1×4’s from Menard’s
- Tightbond II
- Danish Oil
- Oil-based semi-gloss polyurethane
- Kreg Jig and pocket hole screws.
- Tablesaw, Miter Saw, Scroll Saw, Orbital Sander
And that’s a wrap on this one. Let me know what you think, and if you have any ideas on how I could have done this better. Thanks for reading and watching!
Cheers,
Grant
